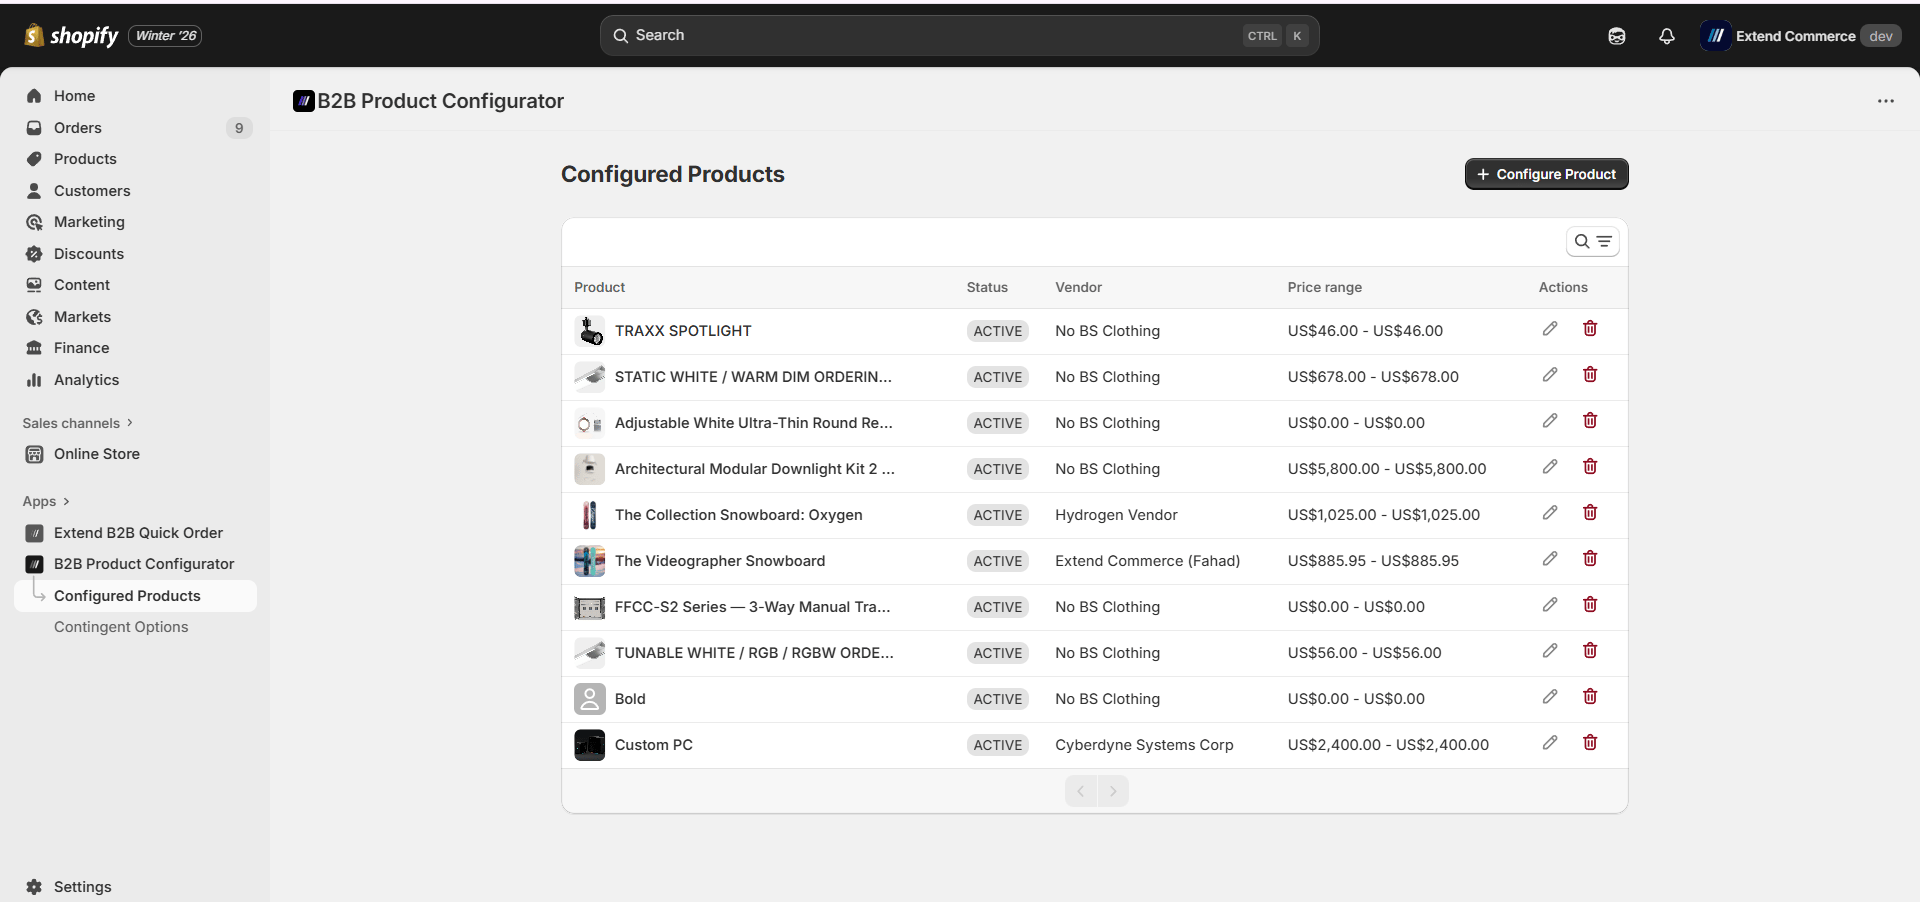
Prerequisites
Before you begin, make sure:- The B2B Configurator app is installed on your Shopify store.
- The base product you want to configure already exists in Shopify.
- Confirm the user has the right permissions/role to access Apps → B2B Product Configurator
Steps to Configure Products
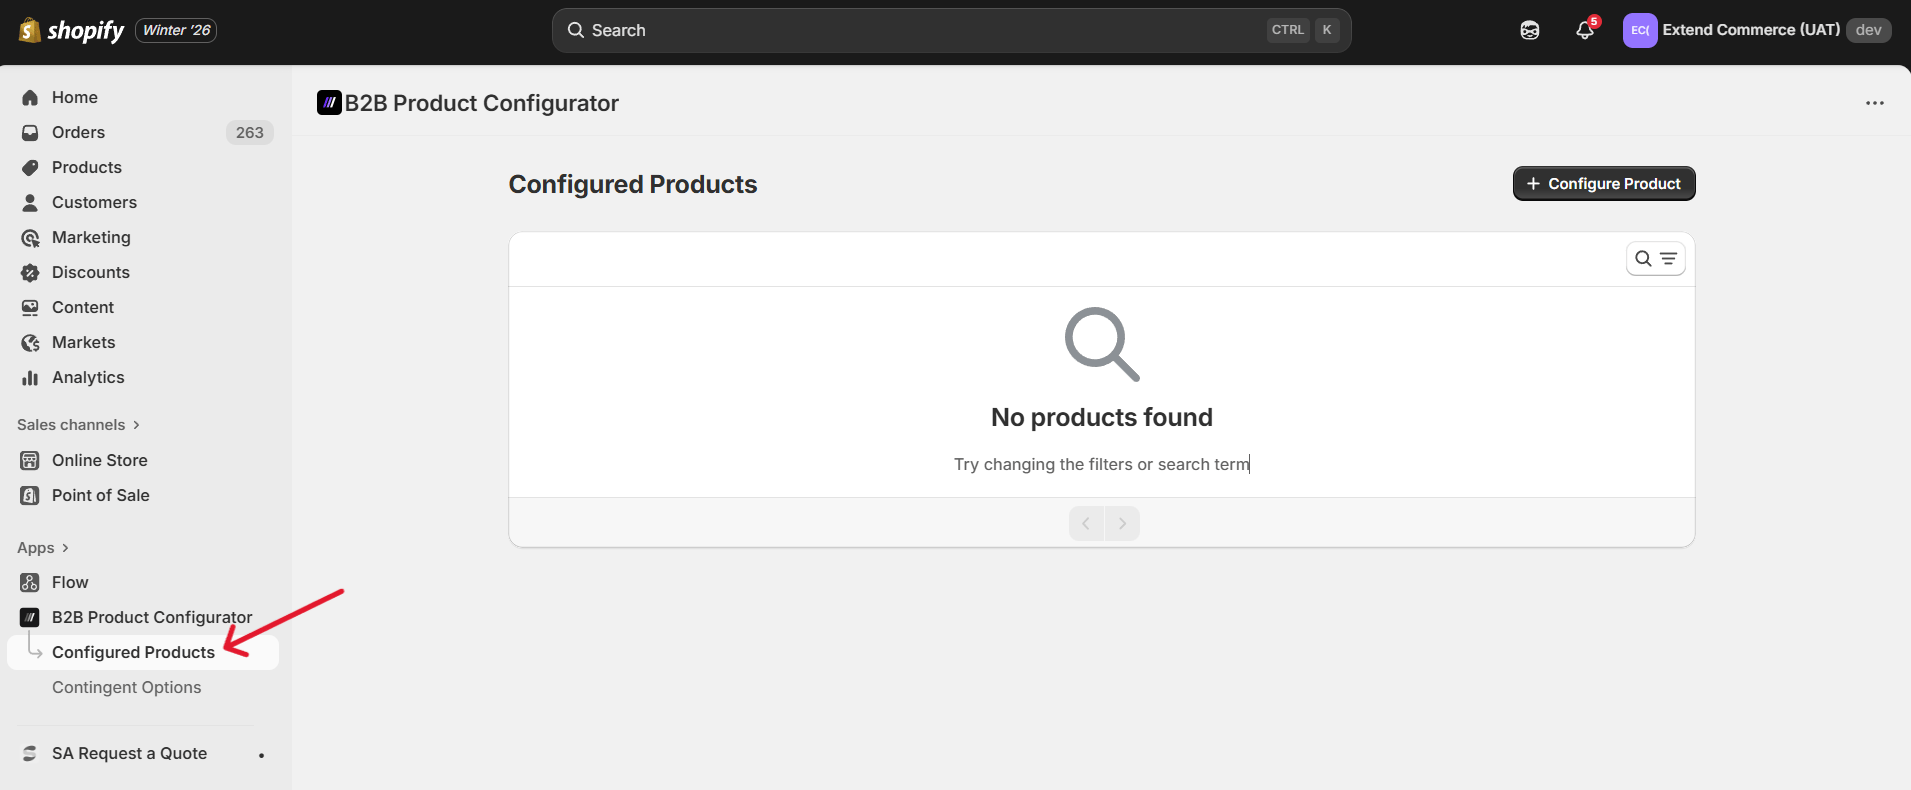
Step 1: Navigate to the B2B Configurator
- Log in to your Shopify Admin
- Navigate to Apps → B2B Product Configurator
- Click Configure Products
Step 2: Configure a Product
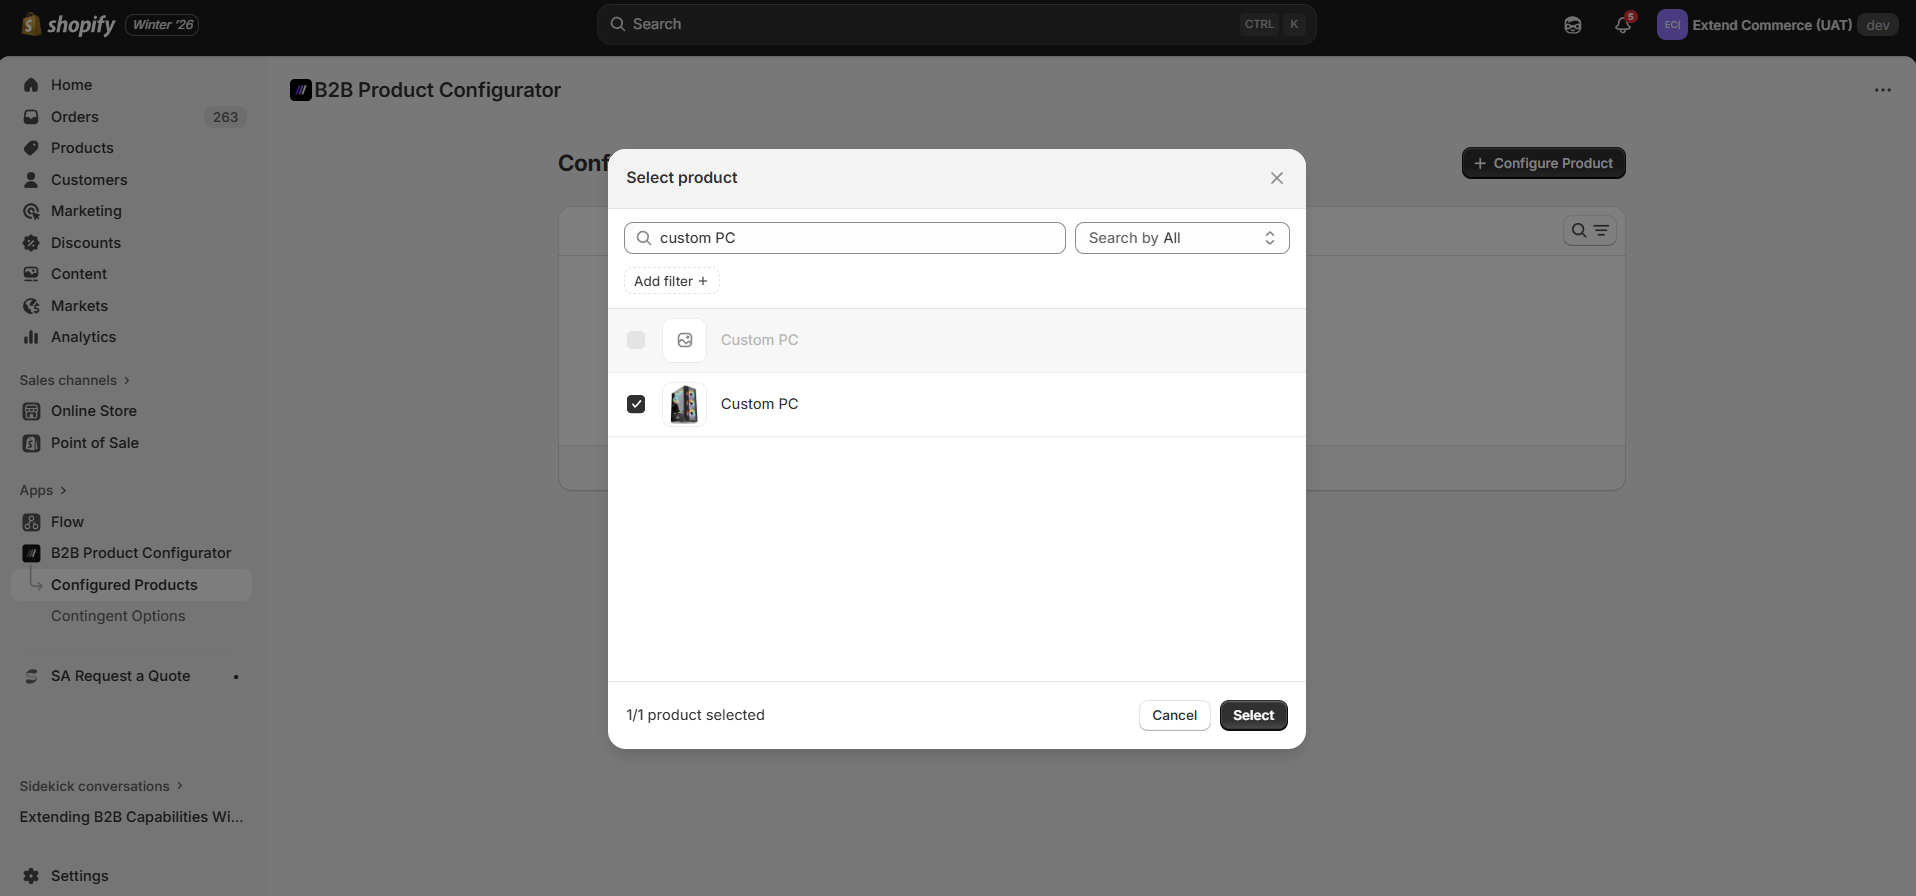
- Click + Configure Product
- In the product picker modal, search and select the Product you want to configure. This product will now act as the parent configurable product.
Step 3: Add Product Parts
- Product parts are the building blocks of your configurable product.
- Parts can be added in two ways: by creating a new part or by reusing an existing product as part.
Option A: Create a New Part
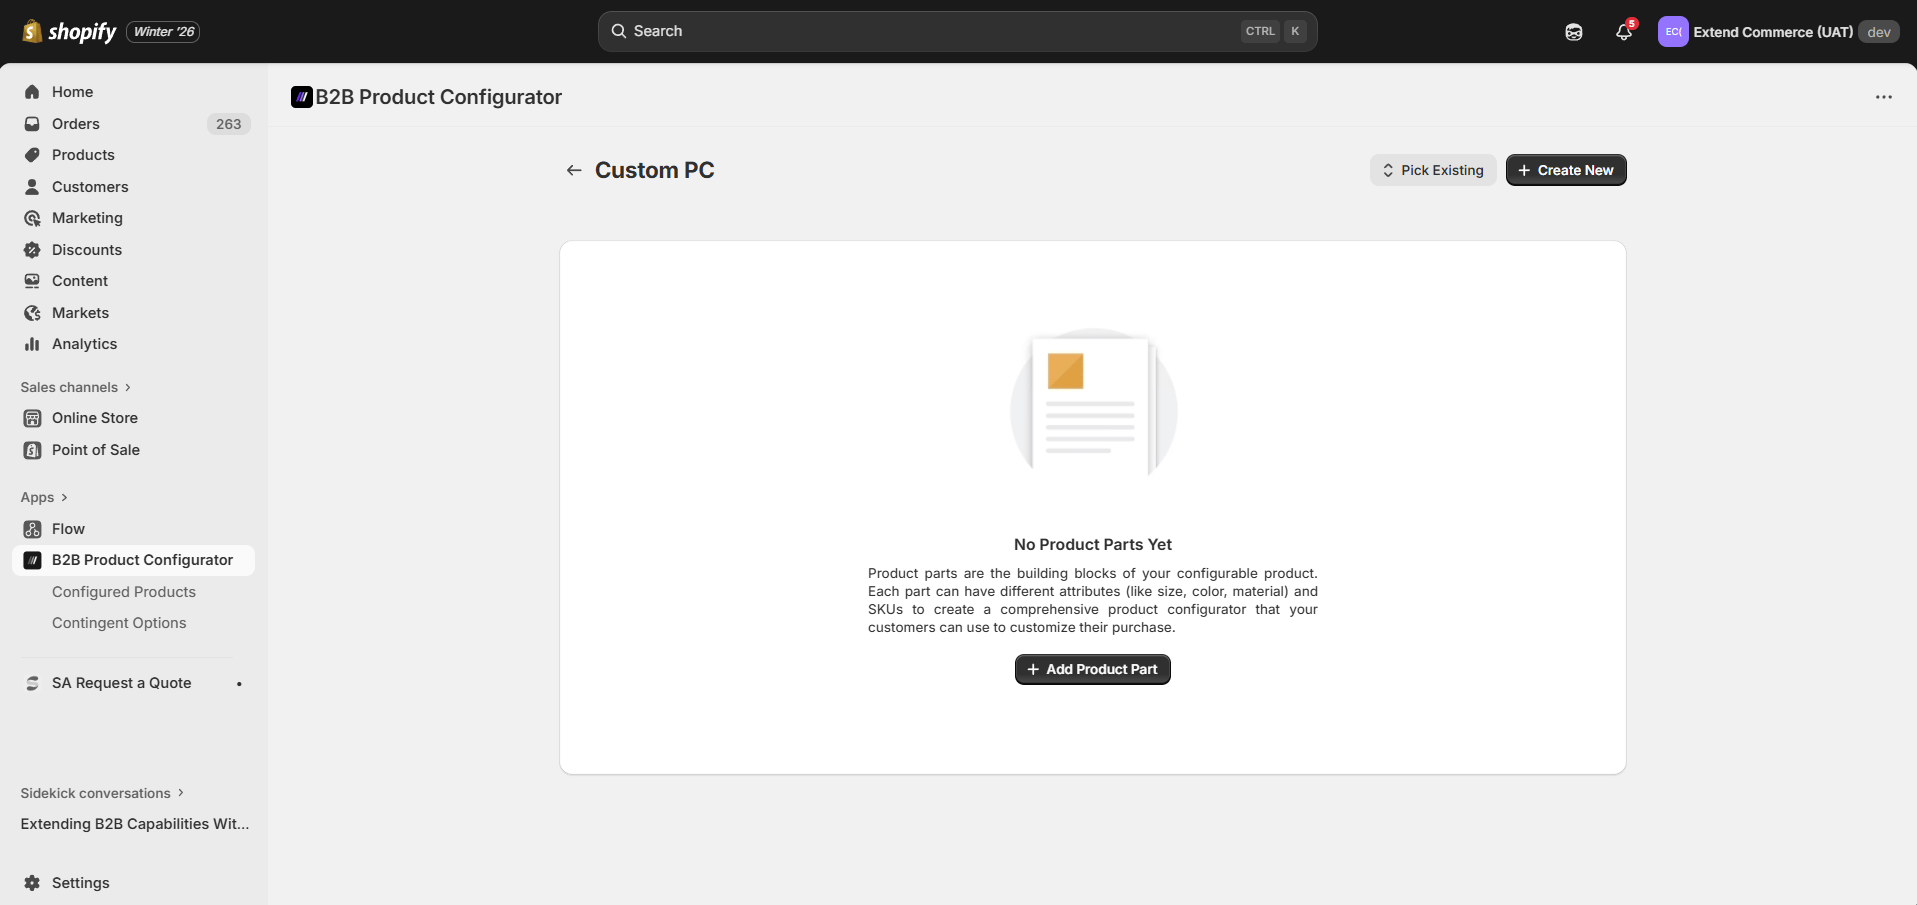
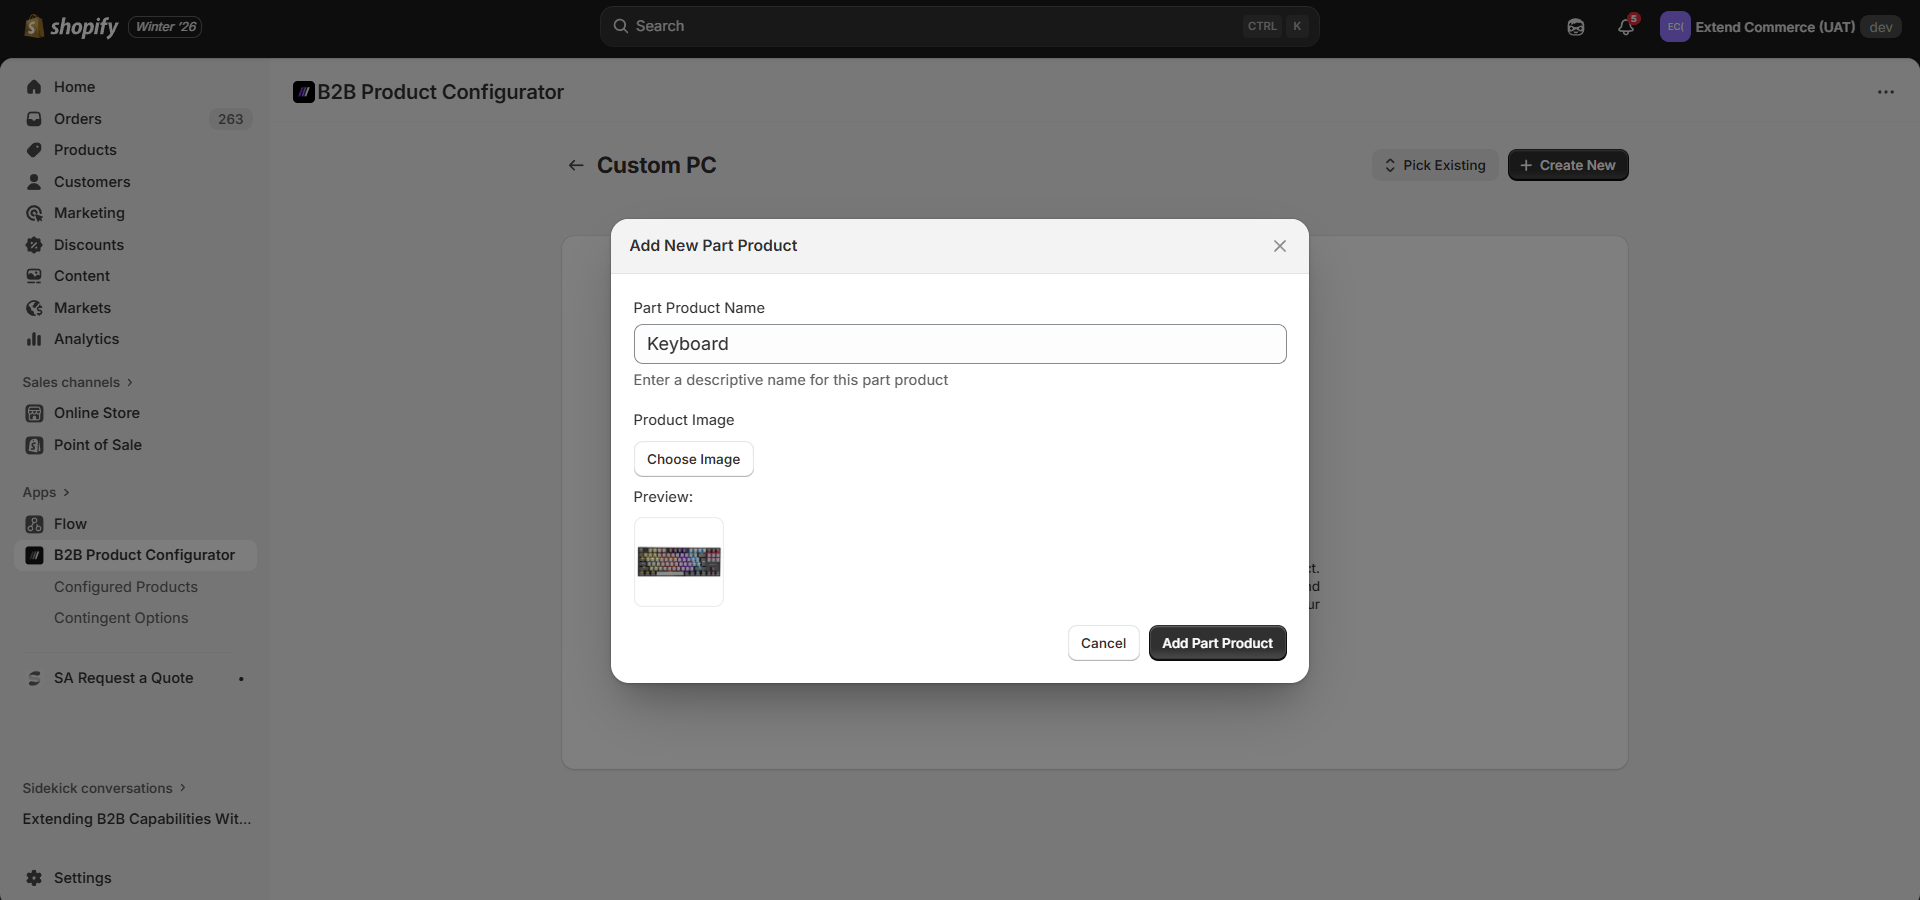
- On the product configuration page, click + Add Product Part
- Enter a Part Product Name (e.g. Keyboard)
- Upload an optional Part Image
- Click Add Part Product
Option B: Add an Existing Part
This allows you to reuse the same part across multiple configurable products, ensuring consistency and saving setup time.- Click Pick Existing
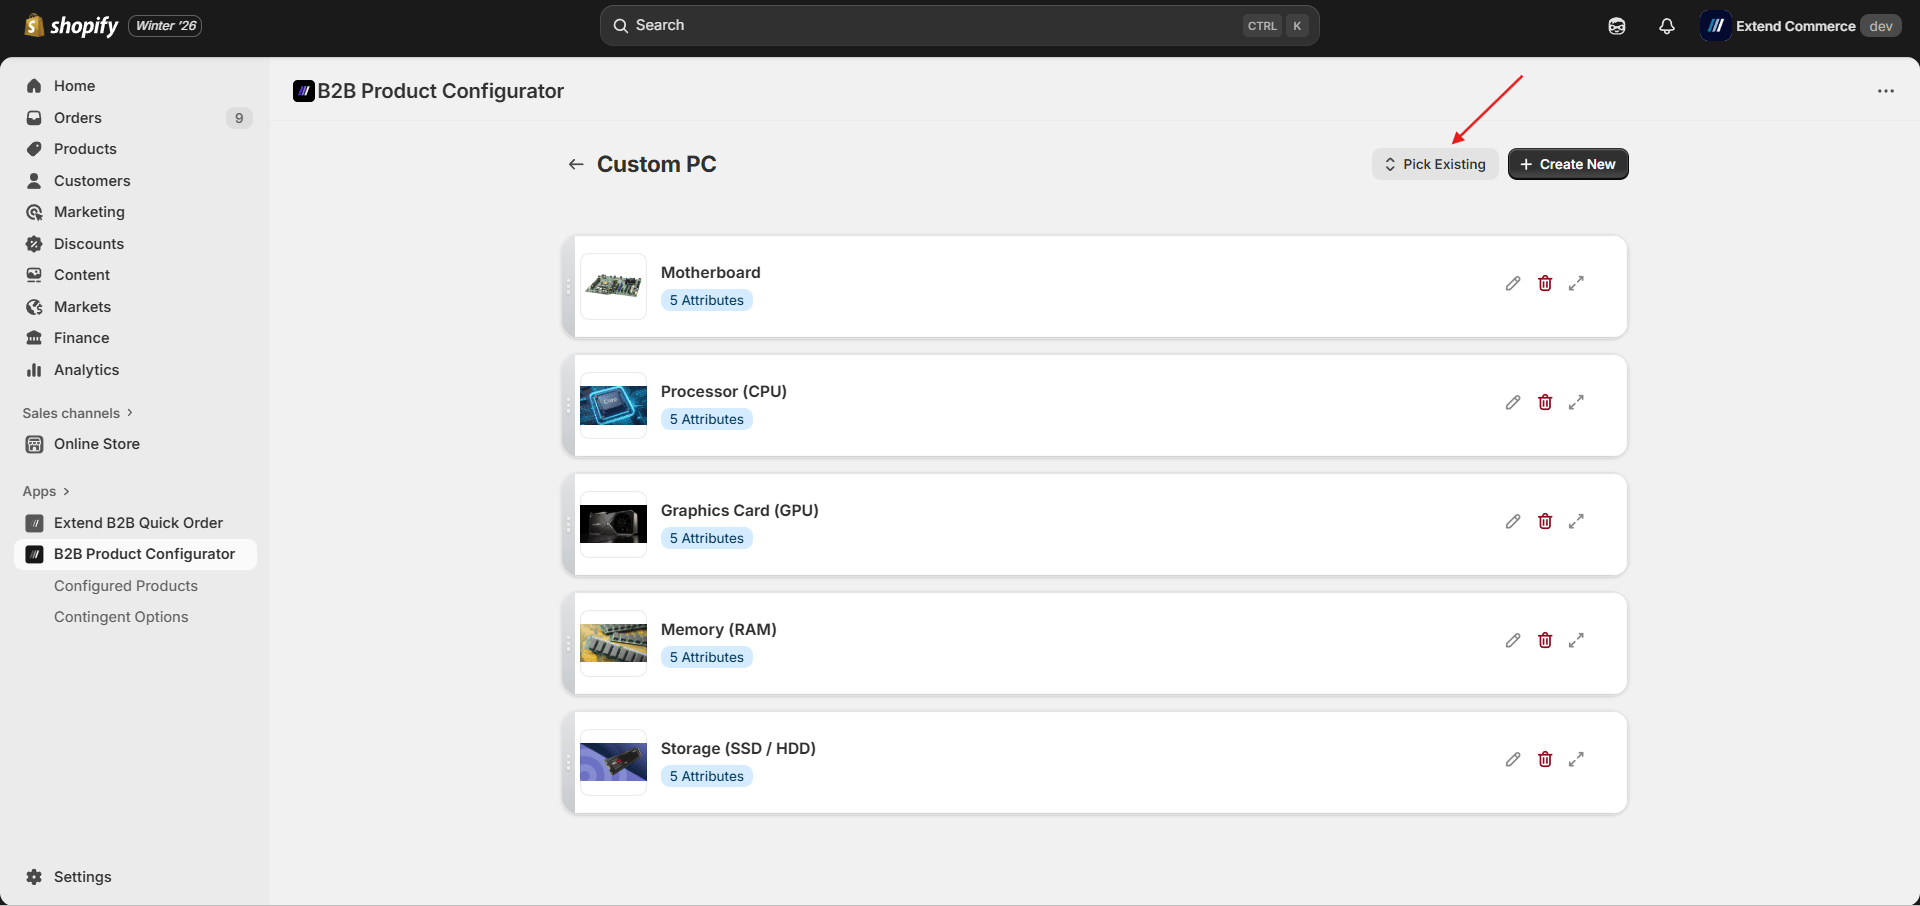
- In the product picker modal, search and select the existing Product which you want to be a part and click Save.
- If its attributes and SKUs are already setup in the Shopify they will be prefilled when you will click “Expand Details” for that part.
Step 4: Add Attributes to a Part
Attributes define how a part can vary.- Click on “Expand Details” of product part
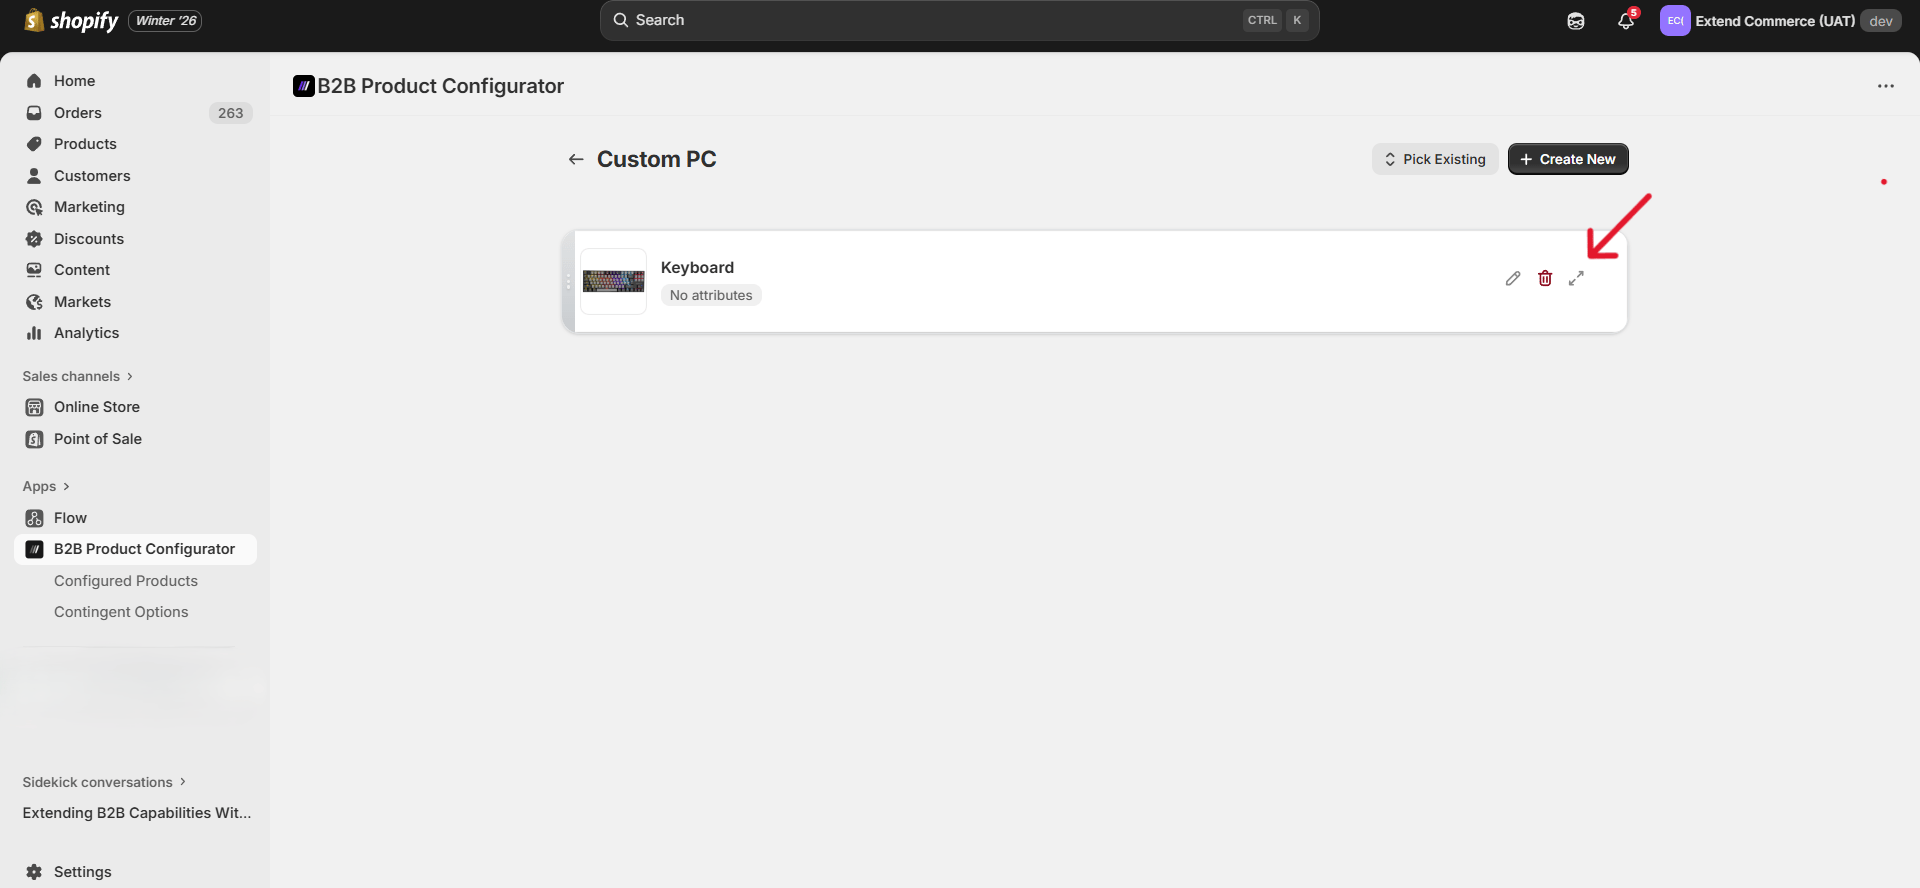
- In the Attributes Configuration section, click + Add Attribute
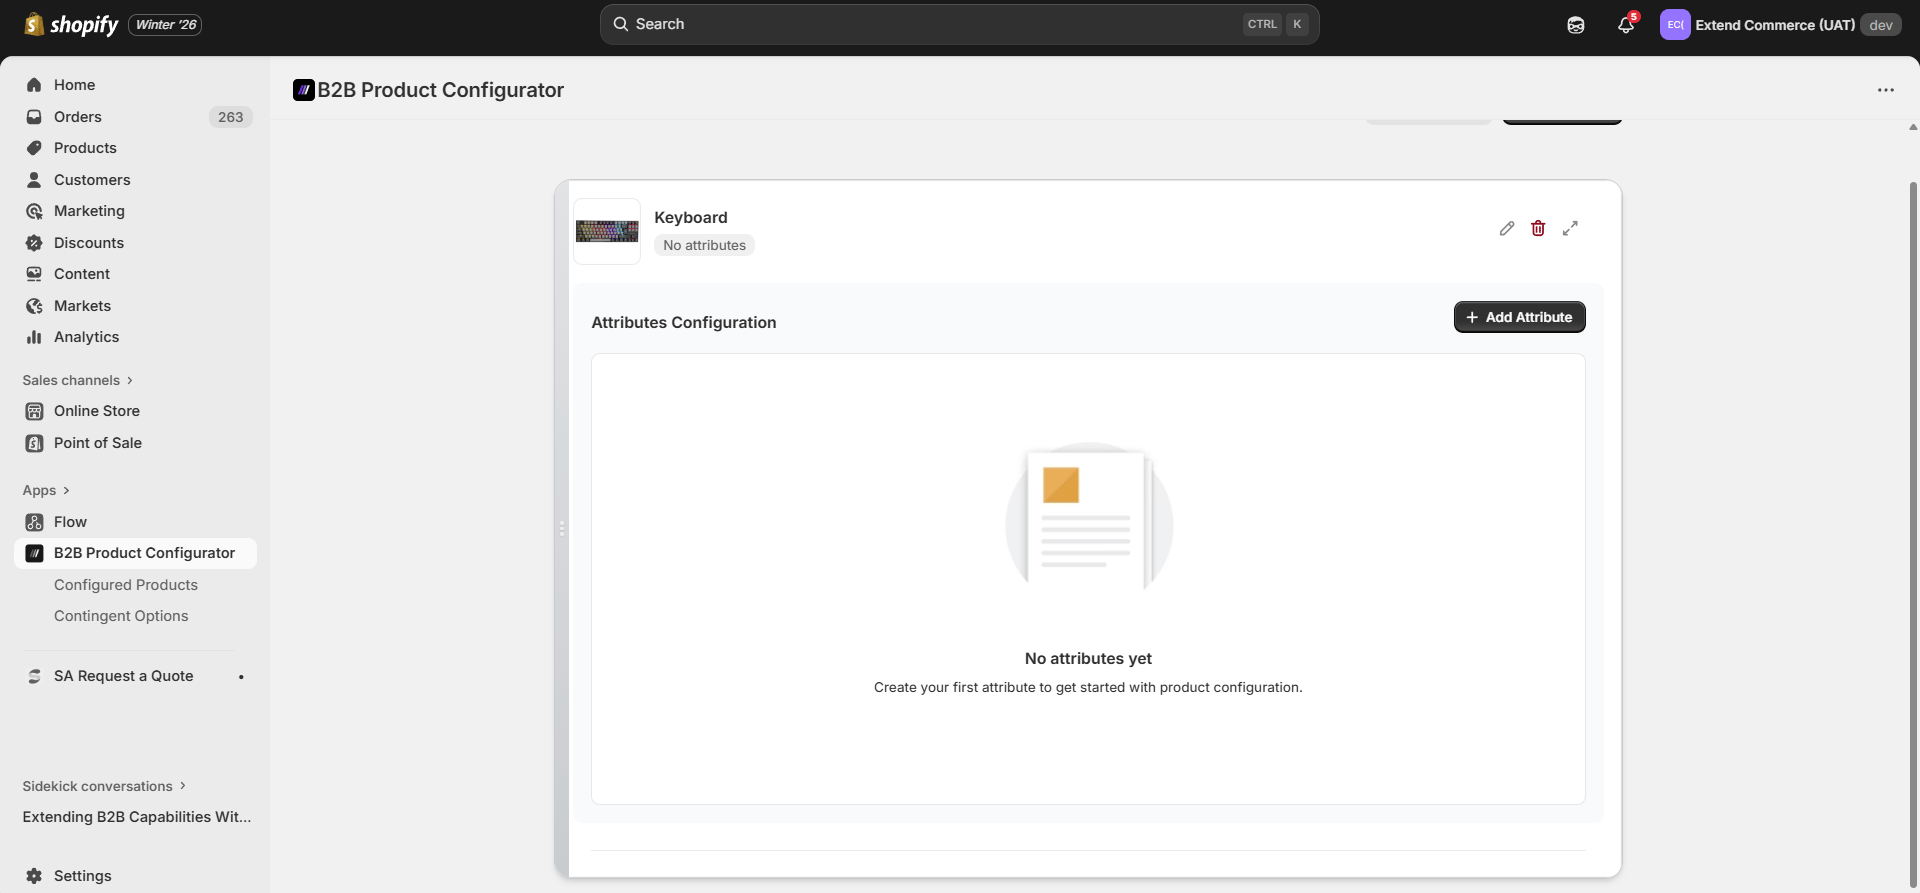
- Enter: Display Name (e.g. Keyboard Type) Attribute Name (auto-generated)
- Click Add Value to start adding attribute values
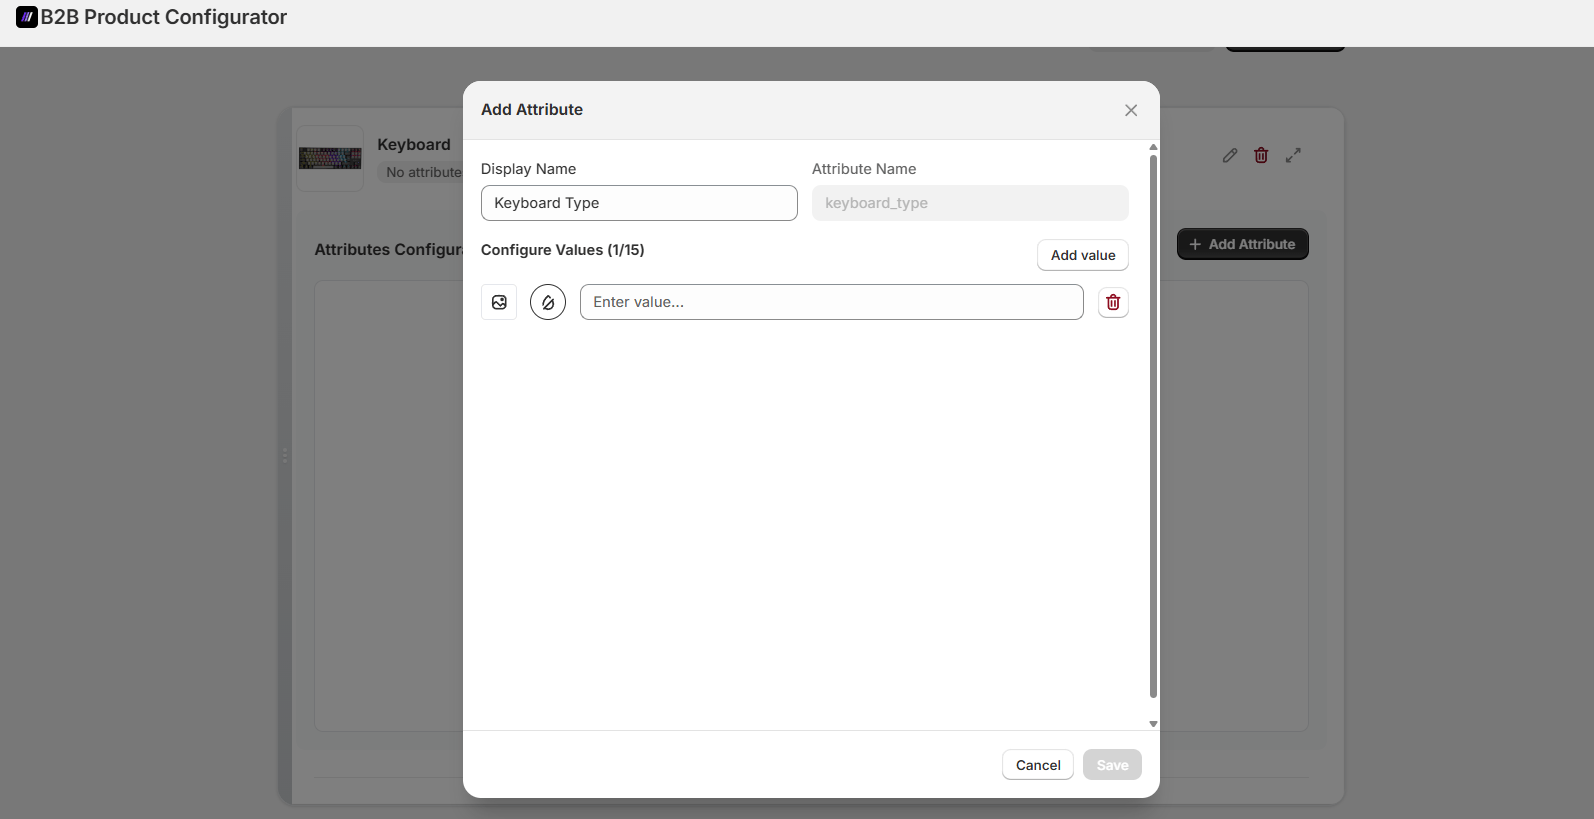
Step 5: Add Attribute Values
Attribute values are the selectable options shown to customers. For each value:- Enter the value name
- Upload an optional image or Select a color swatch
- Click Save
You can add up to 15 values per attribute.
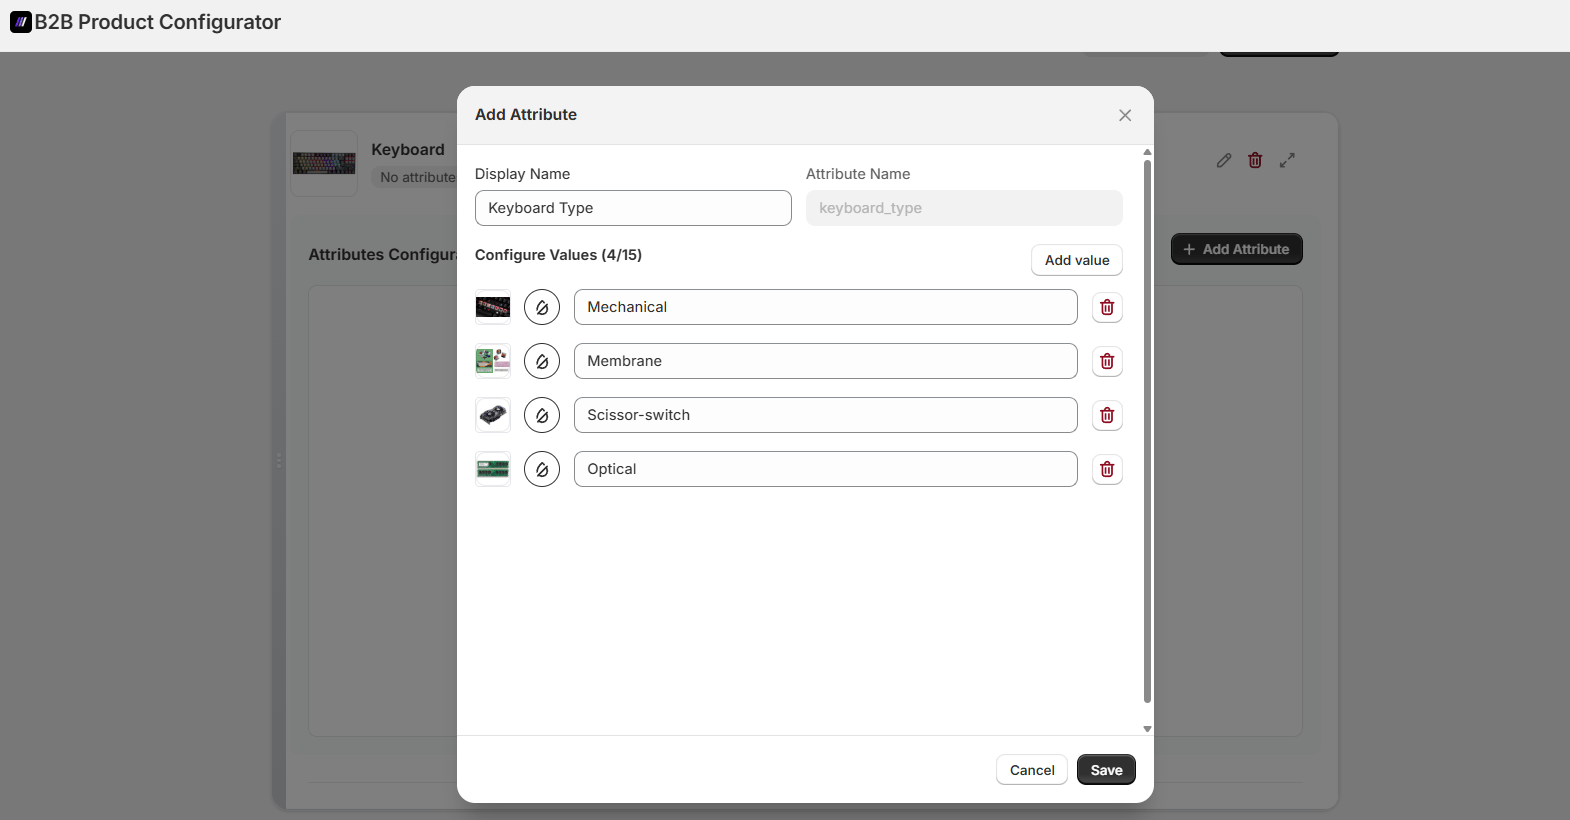
Step 6: Configure SKUs
SKU configuration links attribute values to real SKUs for inventory, pricing, and fulfillment.- Scroll to the SKU Configuration section
- Click + Add SKU
-
For each SKU:
- Enter a SKU Code (e.g. ME-101)
- Select the corresponding Attribute Value for which the SKU is.
- Upload an image if required
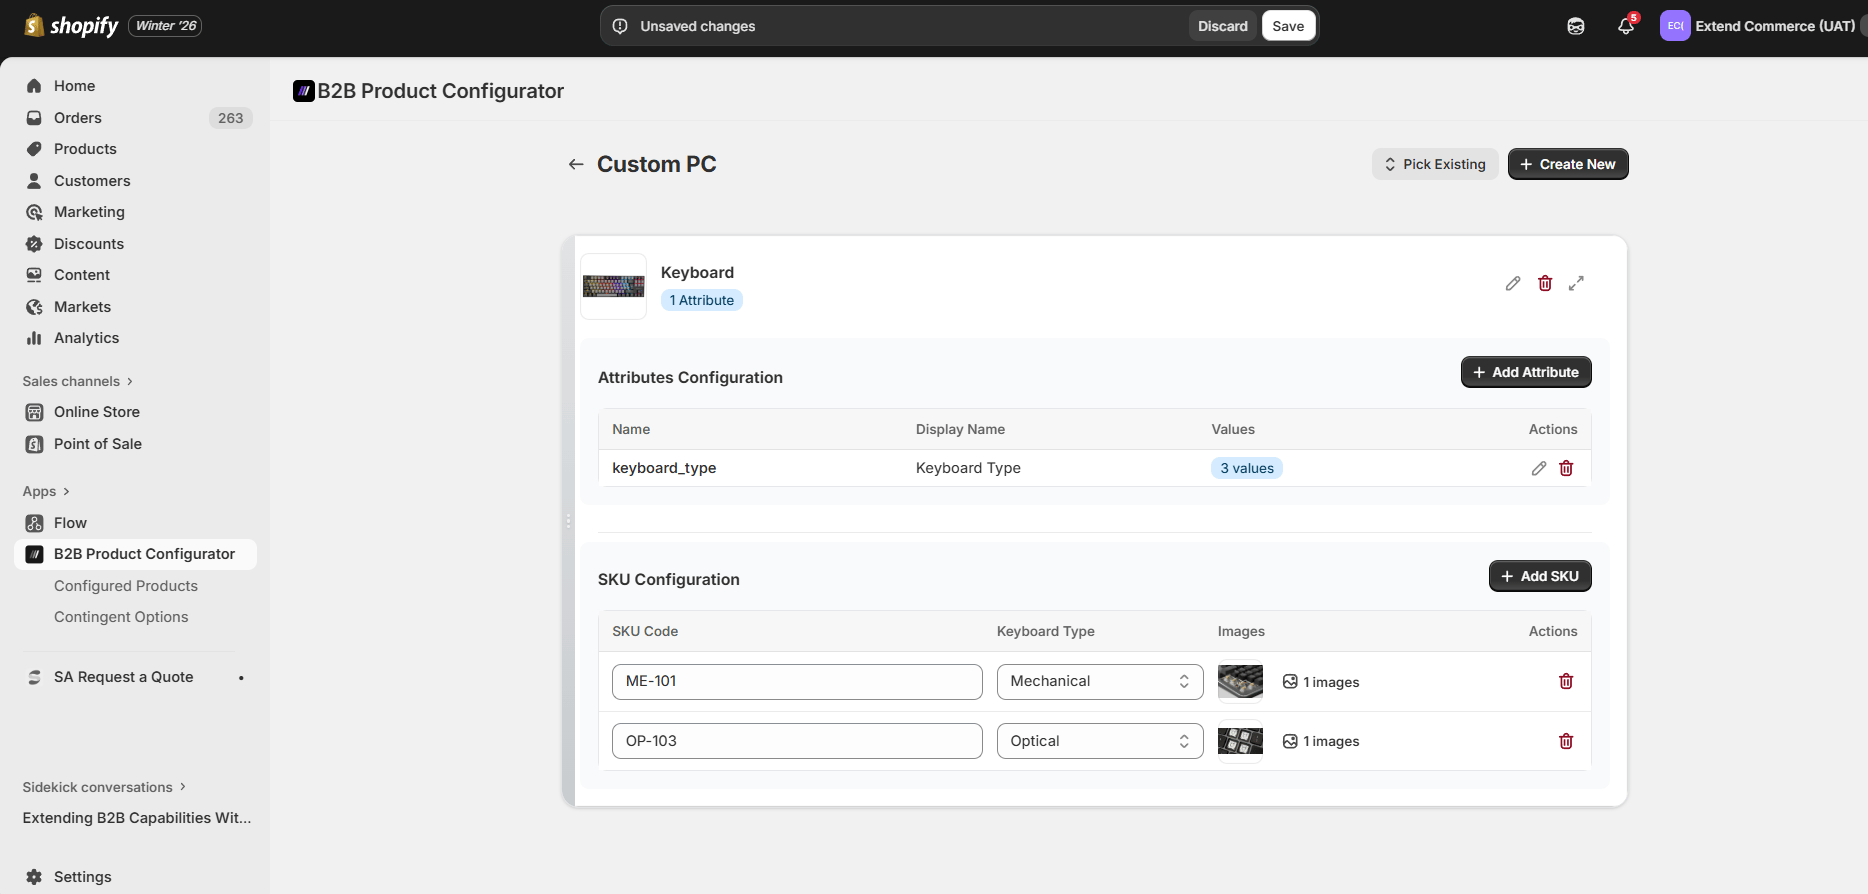
Editing and Deleting
You can update part details, attributes, attribute values, and SKUs at any time by clicking the Edit icon next to the respective item. To remove any of the following:- Product parts
- Attributes
- Attribute values
- SKUs
Note: Deleted items are permanently removed from the configuration and will no longer be available for customer selection.
Step 7: Save Your Configuration
- Click Save at the top of the page
- Your product configuration is now active and ready to be used on the storefront