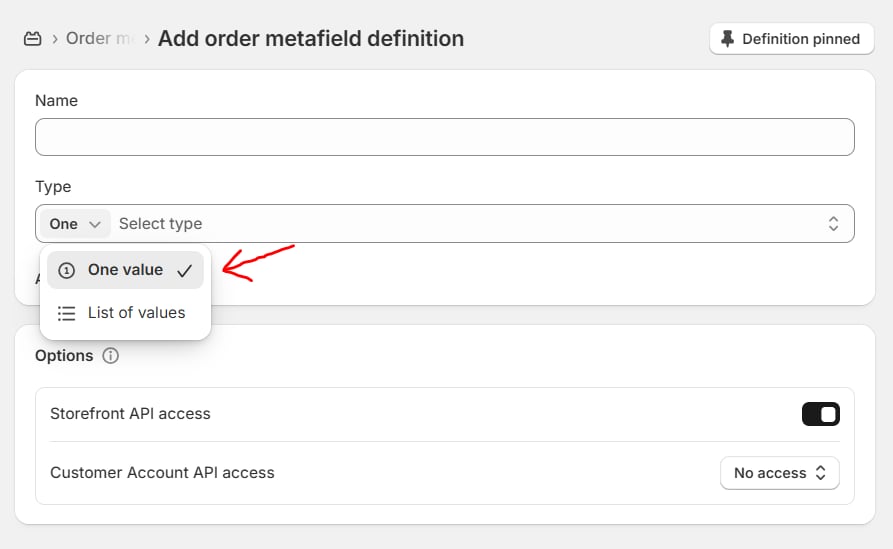
Steps
1. Create Order Metafields in Shopify Admin
First, create the metafields you want to use on the checkout screen.-
In the Shopify Admin, go to:
Settings → Metafields and Metaobjects → Orders - Click Add definition.
-
Create metafields of the following supported types:
- Date
- Single line text
- Choice List (Single line text)
- Save your metafield definitions.
Note: The Single line text and Choice List (Single line text) currently support type: One Value
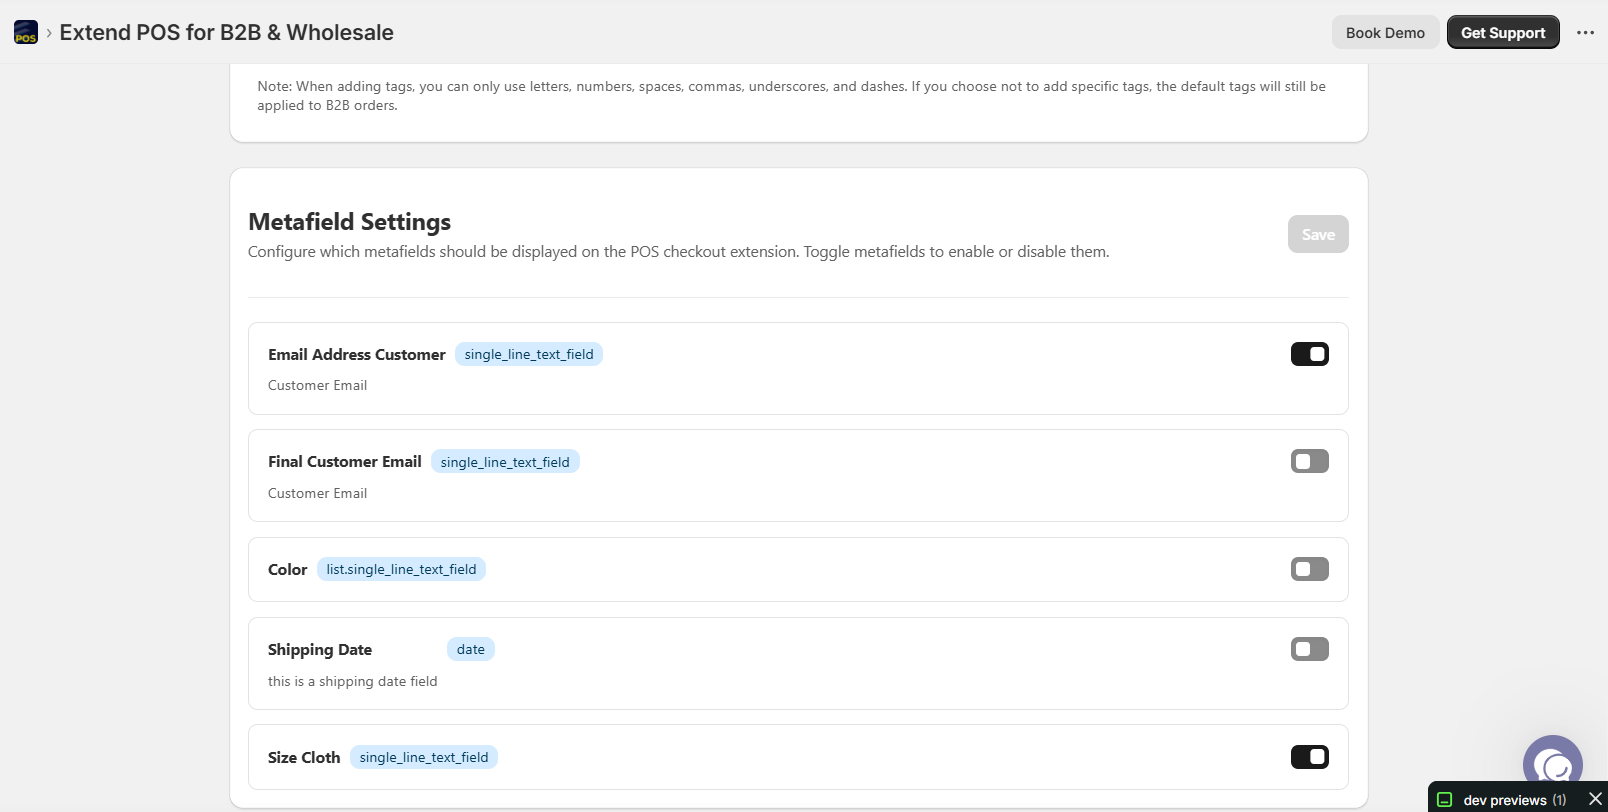
2. Enable Metafields in Extend POS for B2B & Wholesale
After creating the metafields in Shopify, enable them inside our app so they appear on the Checkout screen.- In Shopify Admin, open Extend POS for B2B & Wholesale.
- Go to Settings.
- Navigate to Metafield Settings.
- Enable the metafields you want to display at checkout.
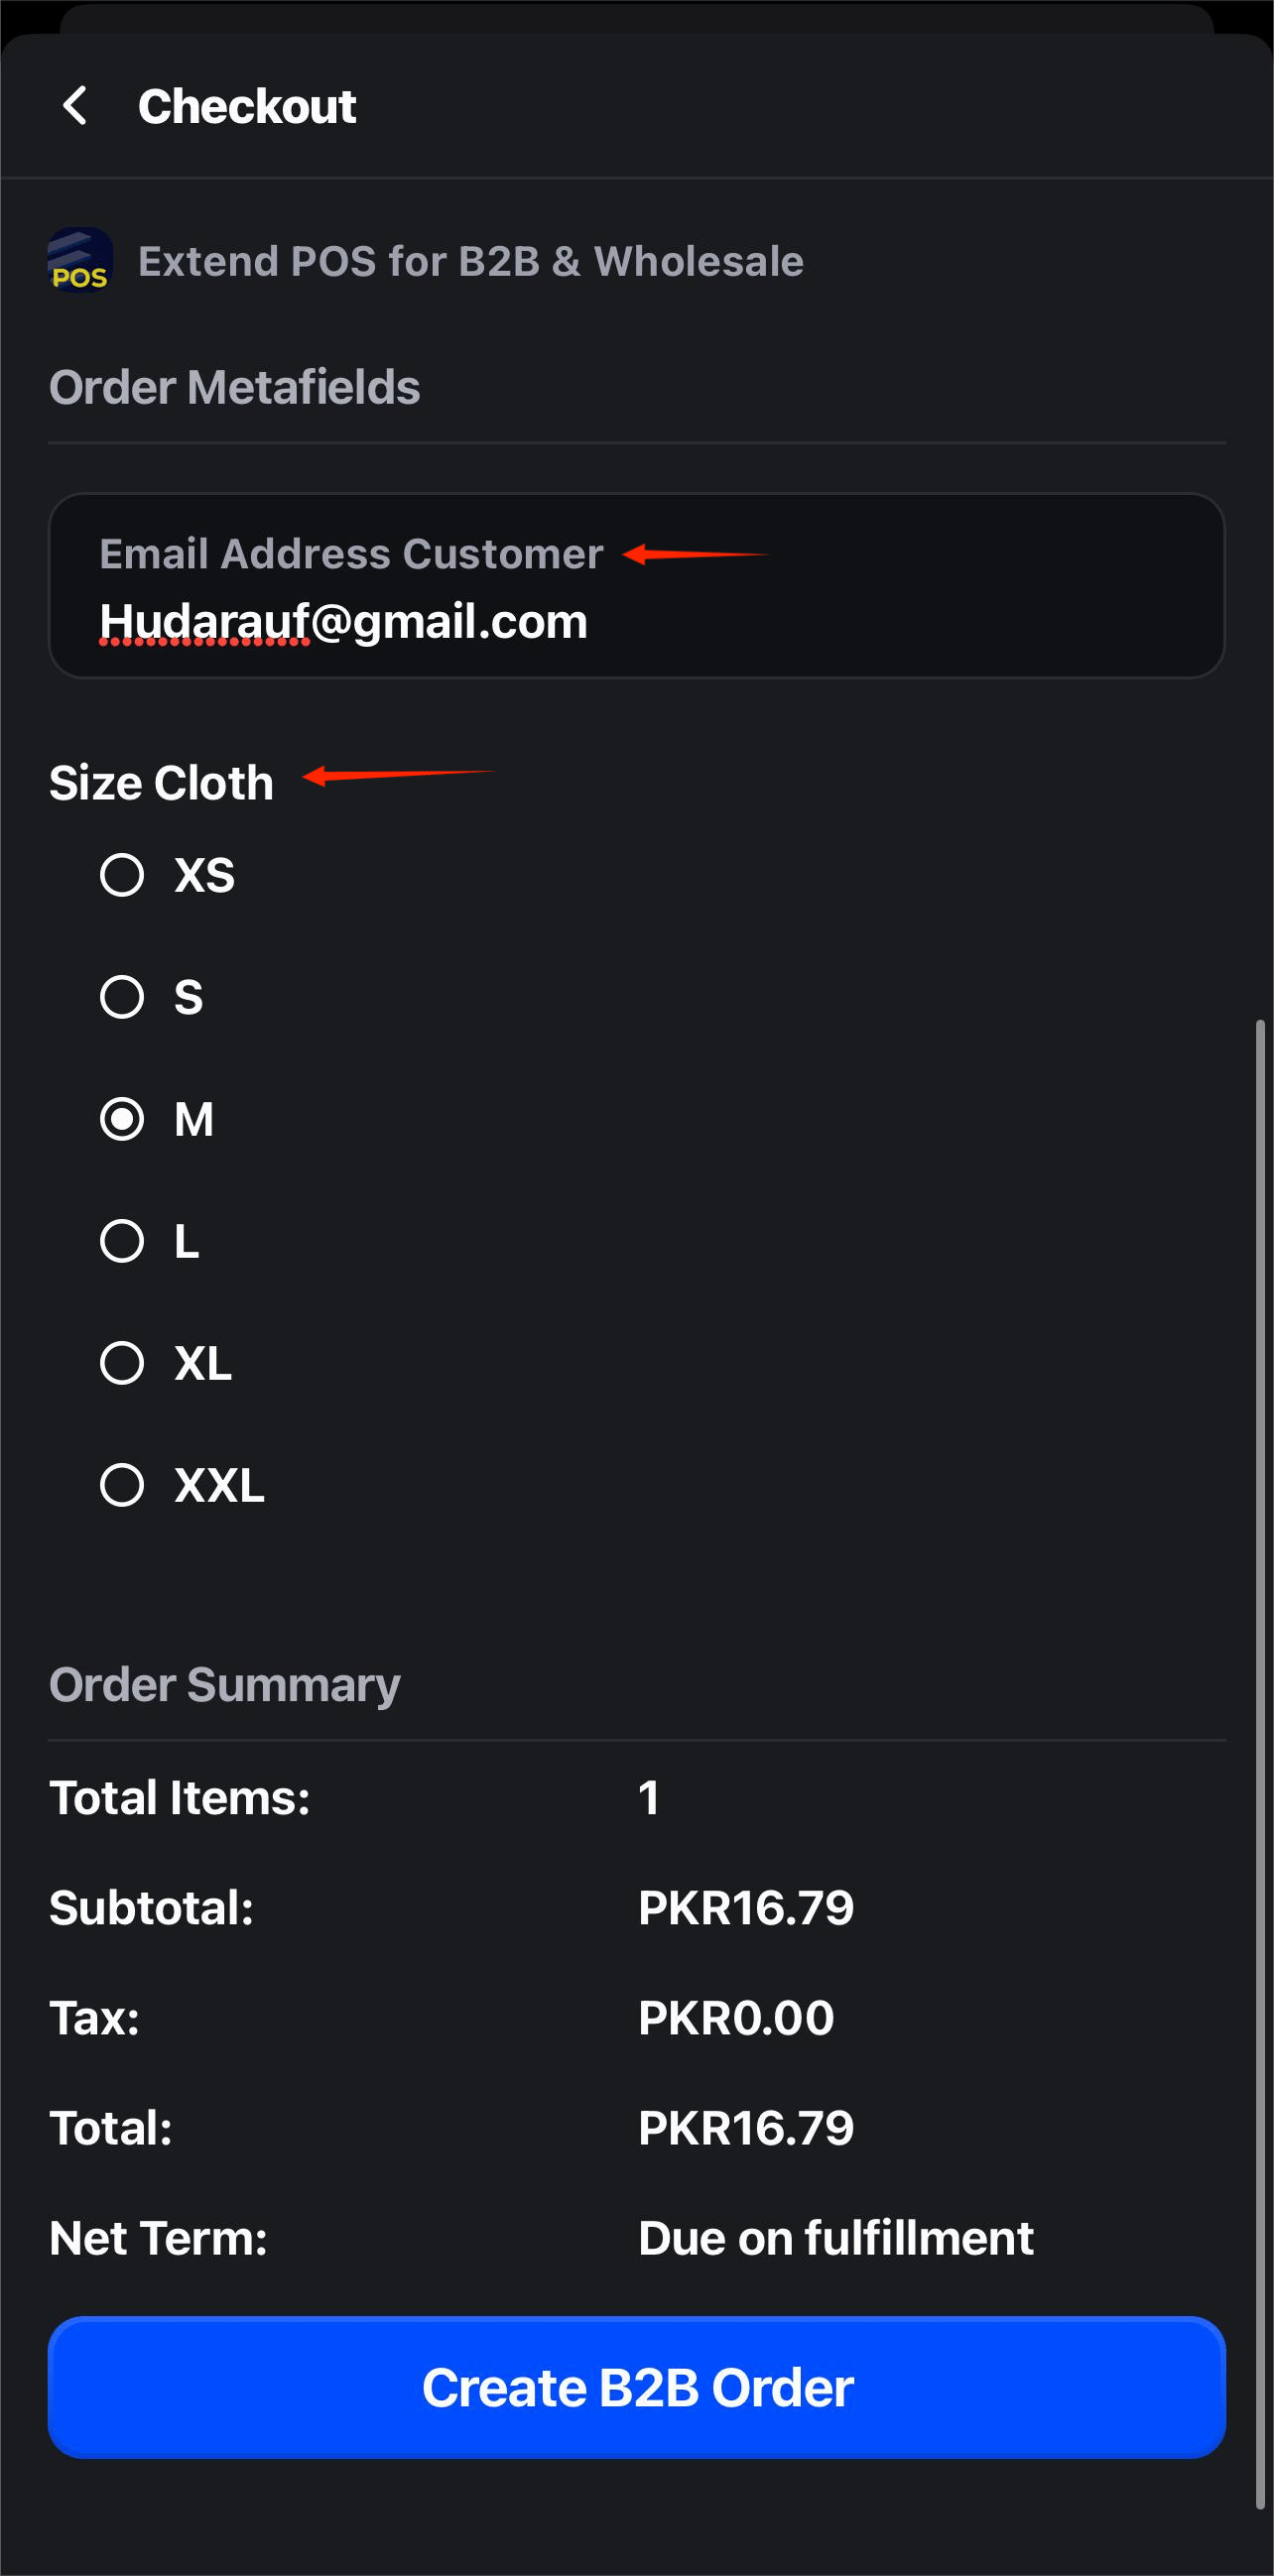
3. Capture Metafields on the Extend POS Checkout Screen
- Open the Extend POS for B2B & Wholesale app on Shopify.
- Create a B2B Order using our app’s usual order creation flow.
- When you reach the Checkout screen, you will now see the metafields you enabled.
- Enter the required values for each metafield.
- Complete the order.
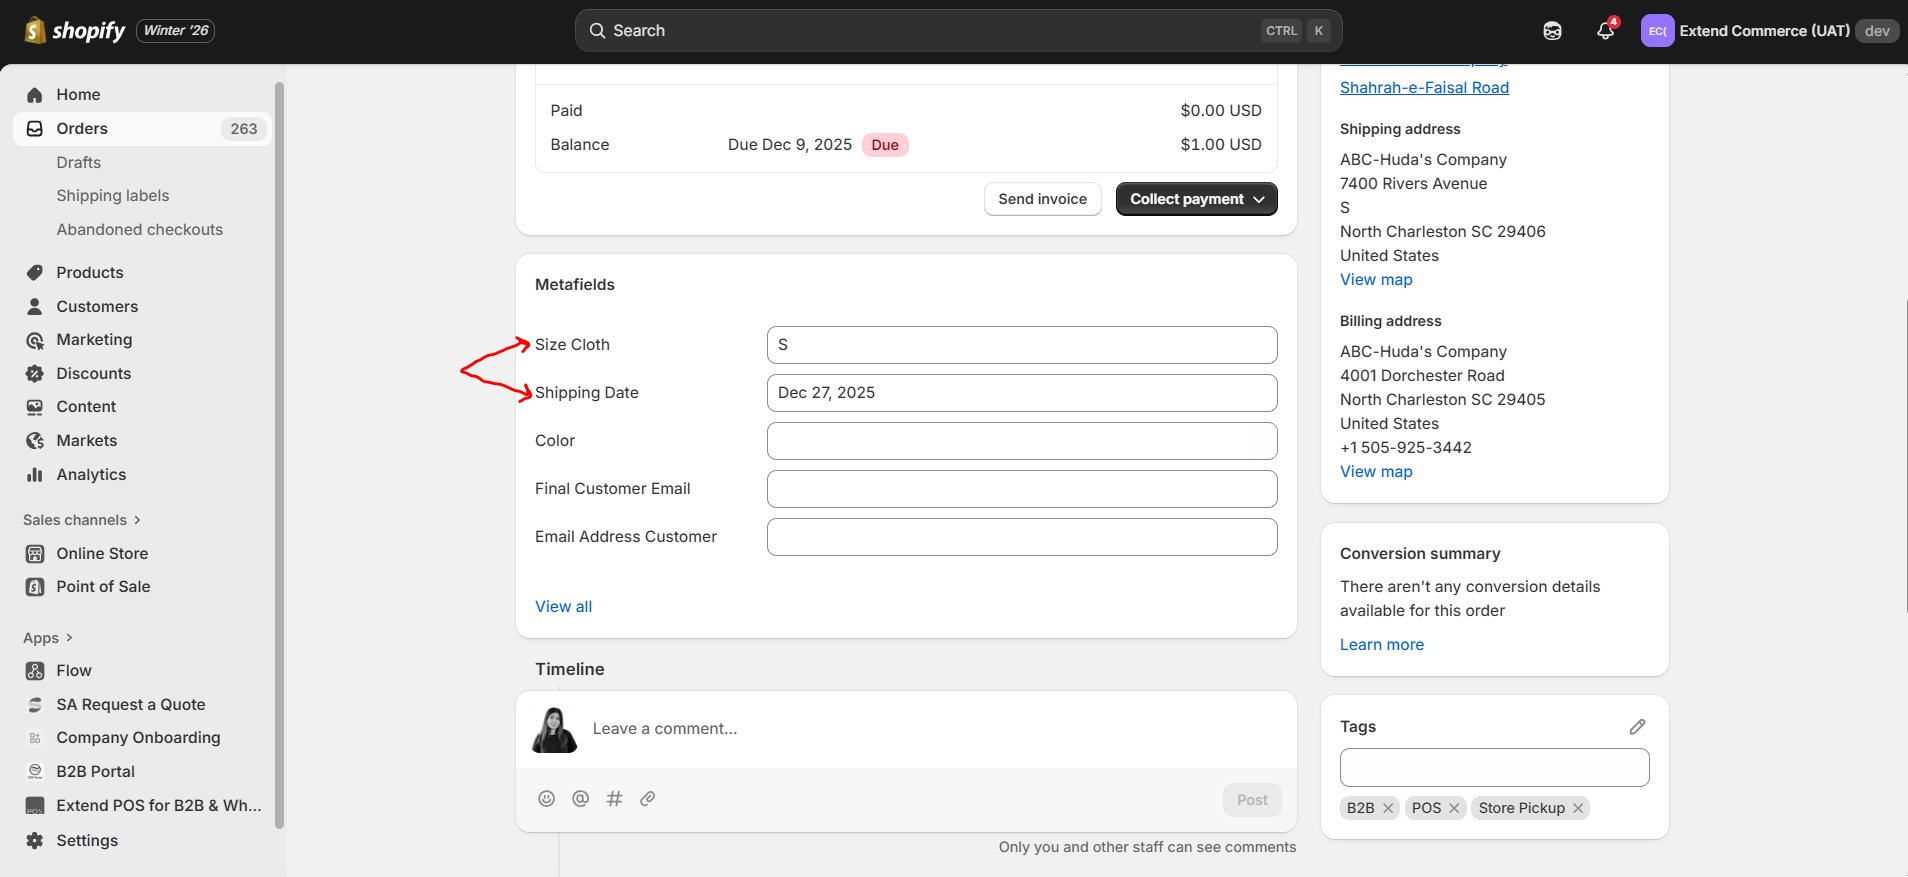
4. Verify Saved Metafield Values
After the order is created:- Go to the order in the Shopify Admin.
- Scroll to the Metafields section of the order.
- Confirm that the values you entered at checkout have been correctly saved.