> ## Documentation Index
> Fetch the complete documentation index at: https://help.extendcommerce.com/llms.txt
> Use this file to discover all available pages before exploring further.
# Configuring Products with B2B Product Configurator
> Step-by-step guide to building configurable, part-based products with attributes, values, and SKUs in the B2B Product Configurator.
# Prerequisites
Before you begin, make sure:
* The **B2B Configurator** app is installed on your Shopify store.
* The base product you want to configure already exists in Shopify.
* Confirm the user has the right **permissions/role** to access Apps → B2B Product Configurator
# Steps to Configure Products
## Step 1: Navigate to the B2B Configurator
1. Log in to your **Shopify Admin**
2. Navigate to **Apps → B2B Product Configurator**
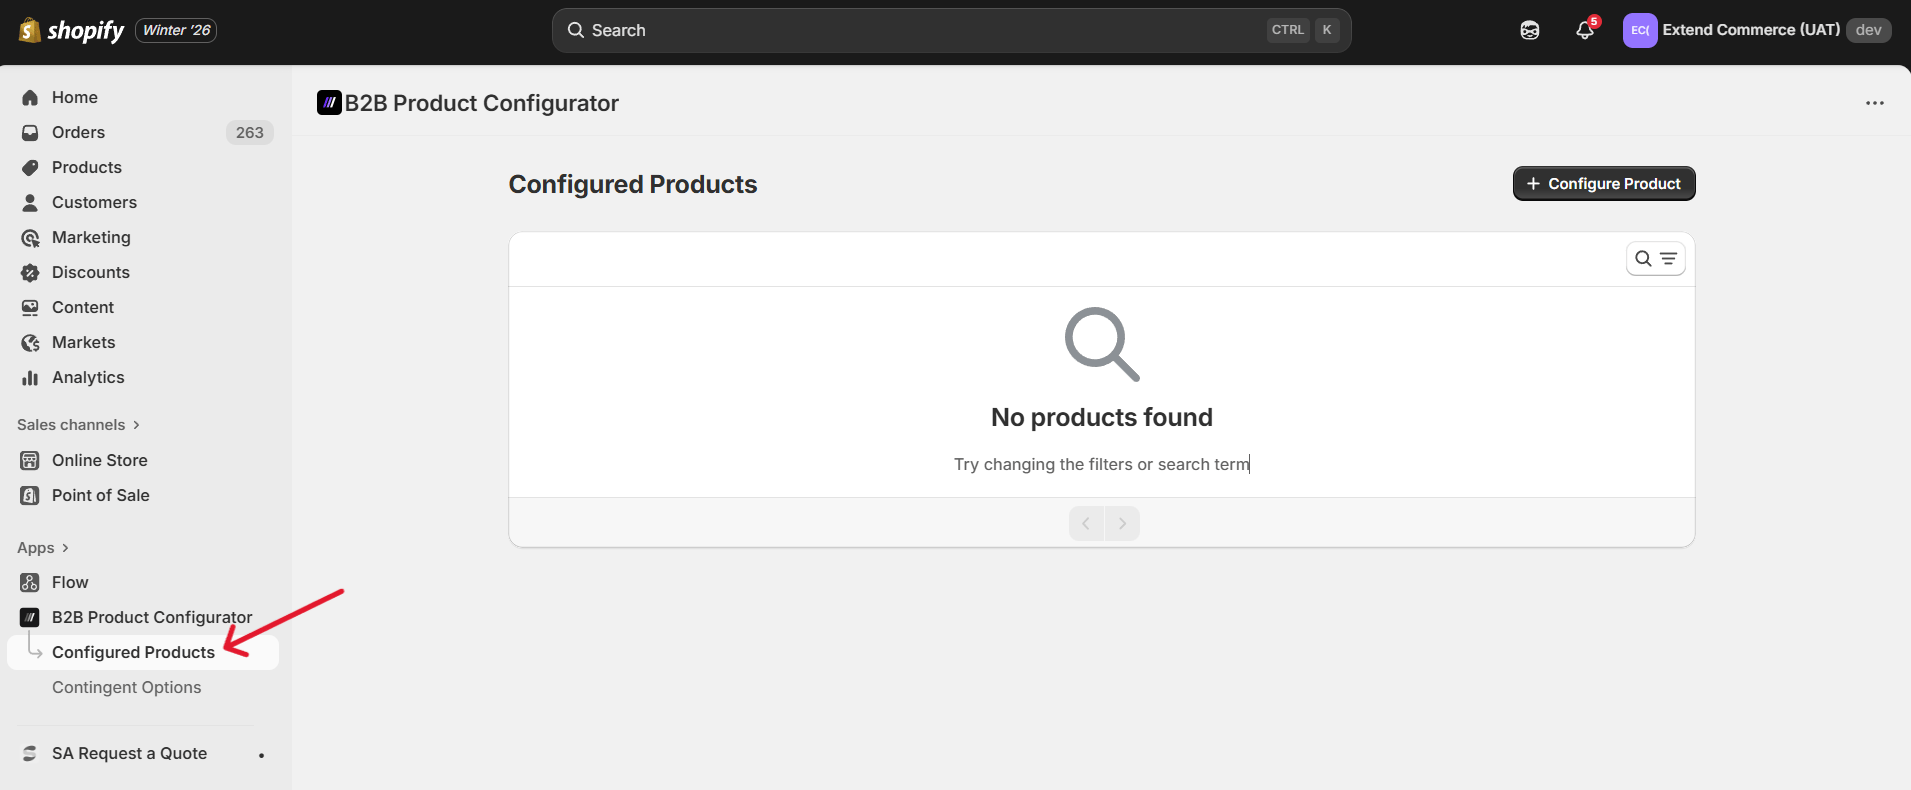
3. Click **Configure Products**
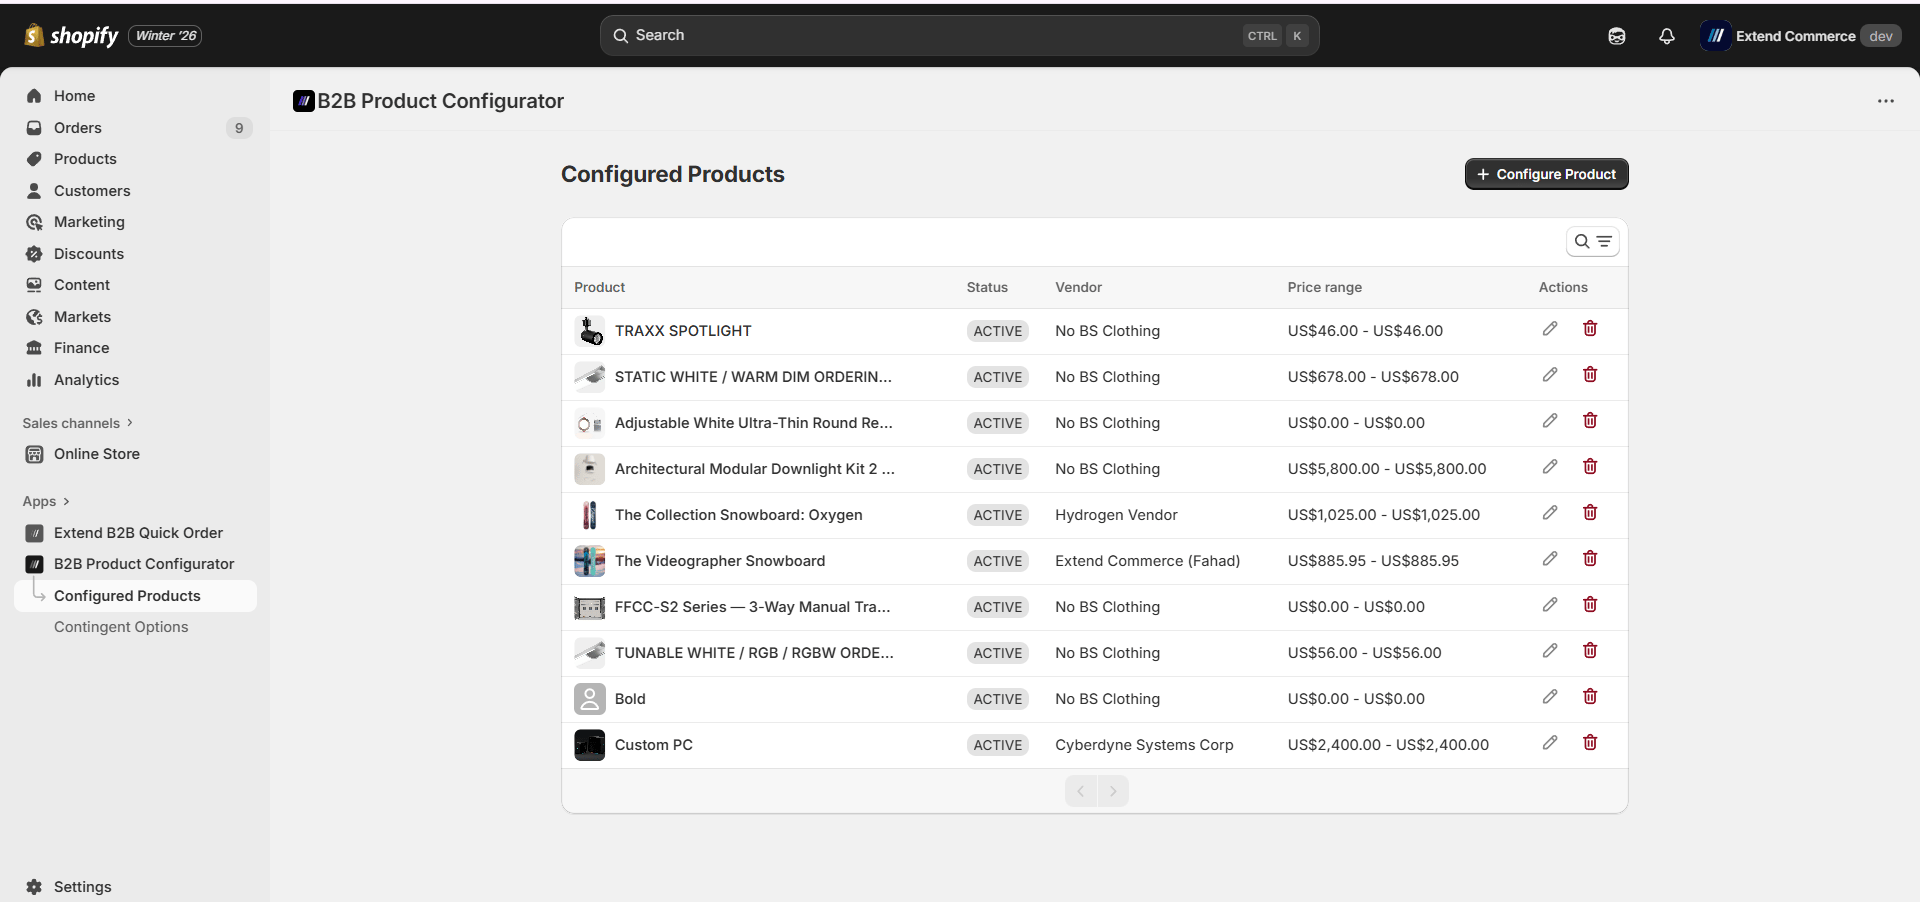
This screen displays all products that have been configured using the app. From here, you can easily **manage your configured products** by editing, deleting, searching, or filtering them.
 ## Step 2: Configure a Product
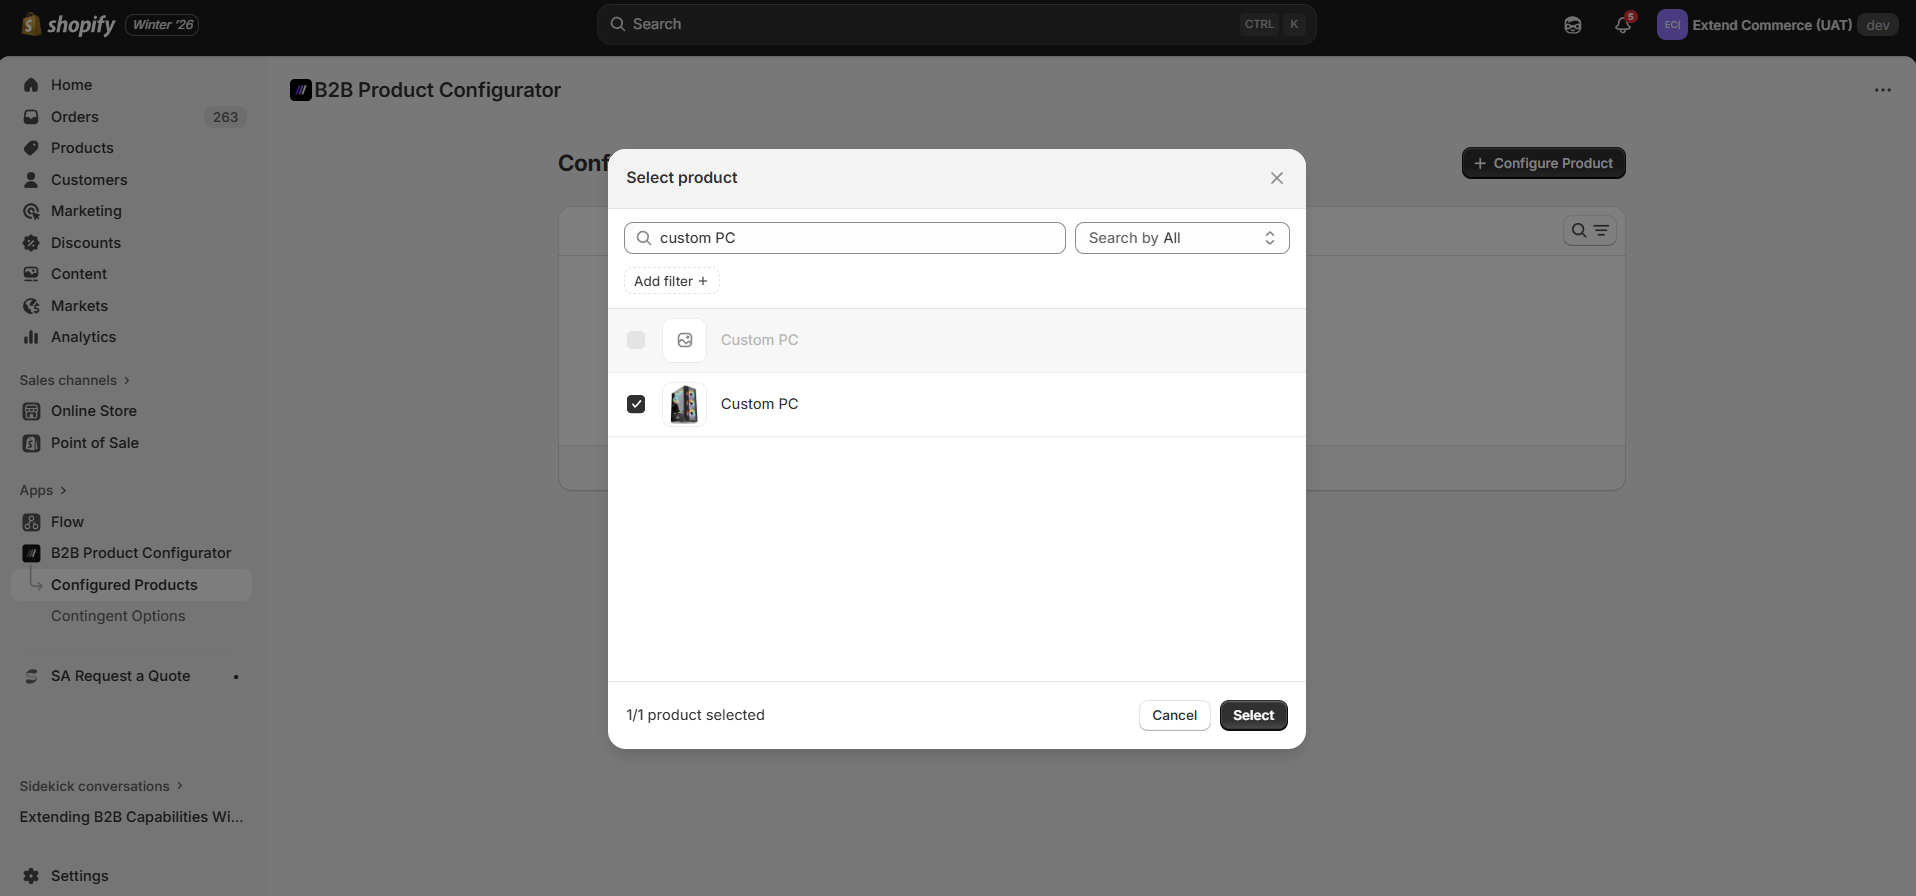
1. Click **+ Configure Product**
2. In the product picker modal, search and select the Product you want to configure. This product will now act as the **parent configurable product**.
## Step 2: Configure a Product
1. Click **+ Configure Product**
2. In the product picker modal, search and select the Product you want to configure. This product will now act as the **parent configurable product**.
 ## Step 3: Add Product Parts
1. Product parts are the building blocks of your configurable product.
2. Parts can be added in two ways: by creating a new part or by reusing an existing product as part.
### Option A: Create a New Part
## Step 3: Add Product Parts
1. Product parts are the building blocks of your configurable product.
2. Parts can be added in two ways: by creating a new part or by reusing an existing product as part.
### Option A: Create a New Part
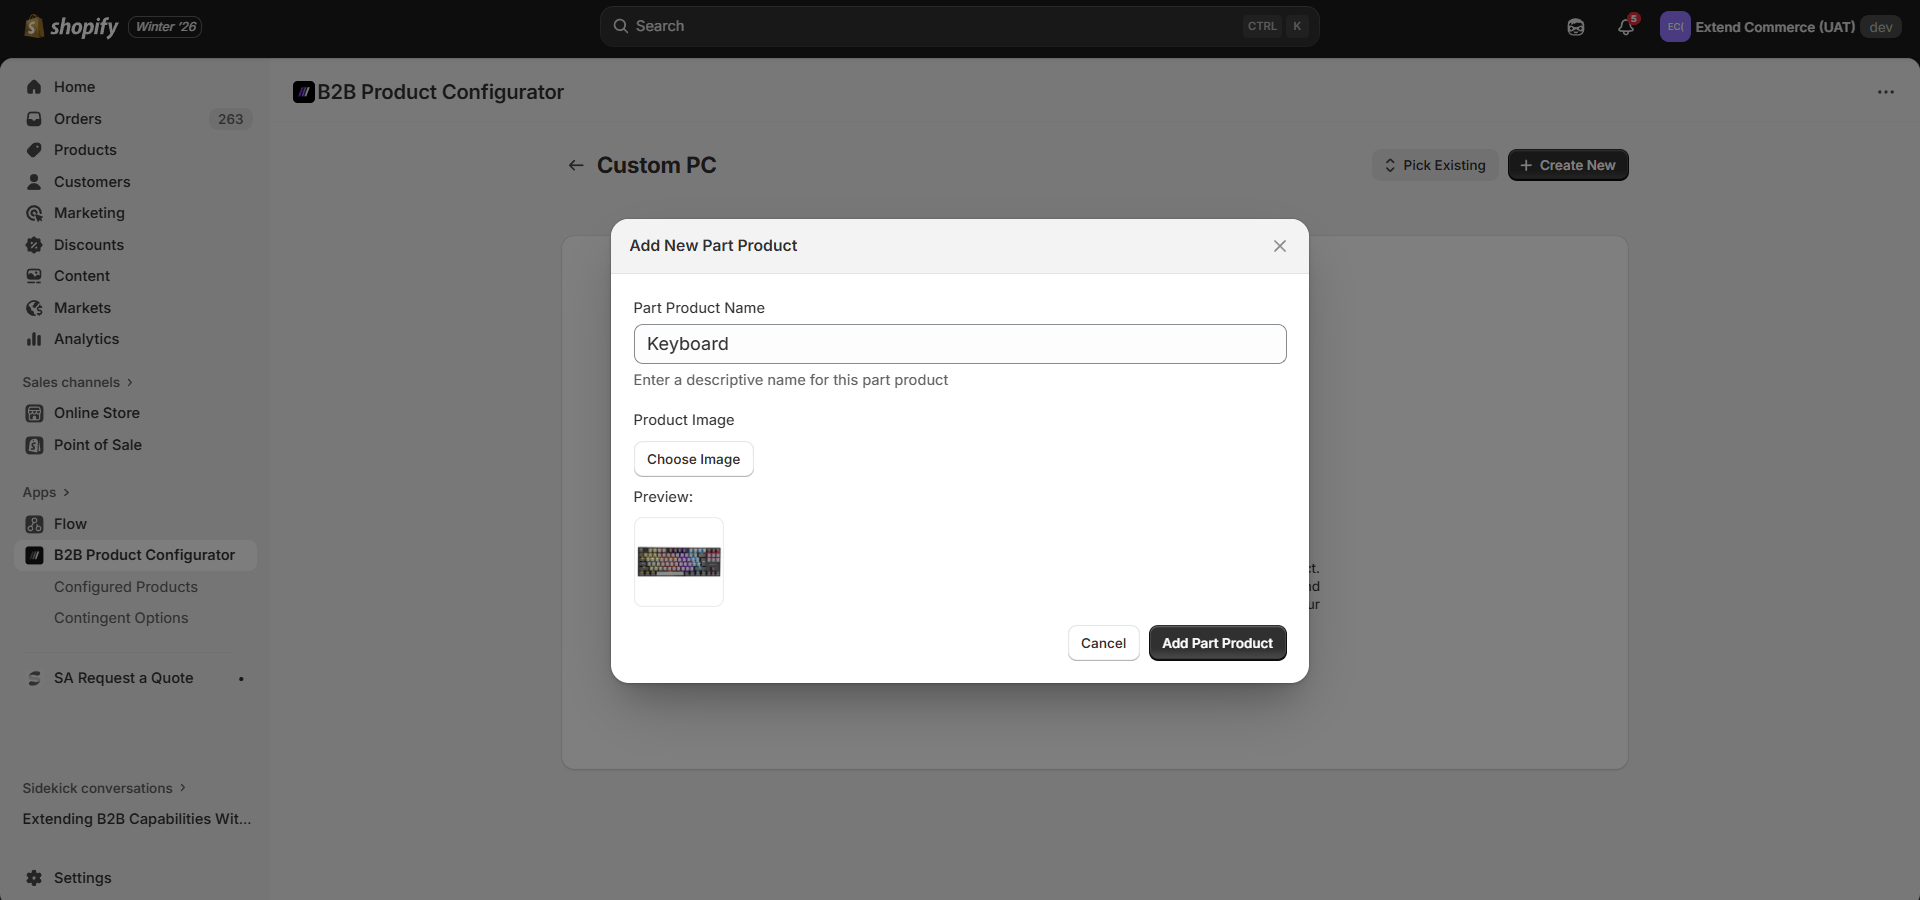
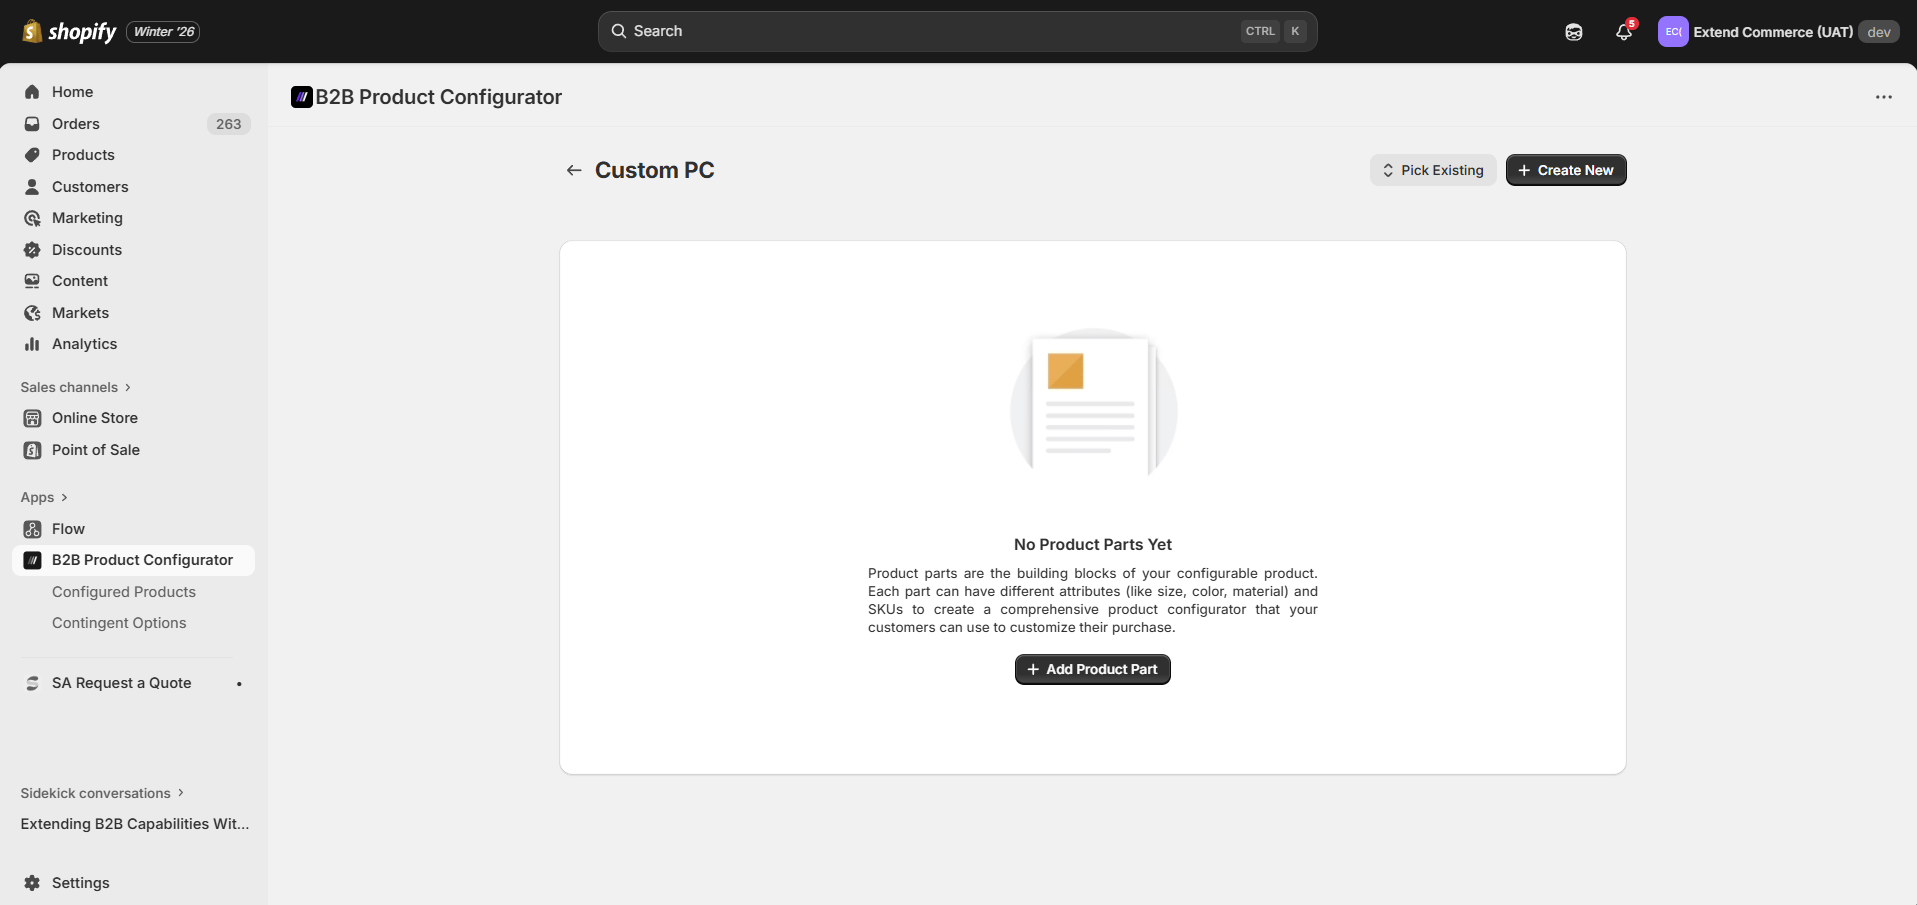 1. On the product configuration page, click **+ Add Product Part**
2. Enter a **Part Product Name** (e.g. Keyboard)
3. Upload an optional **Part Image**
4. Click **Add Part Product**
Repeat this step for each part you want to include in the configuration.
1. On the product configuration page, click **+ Add Product Part**
2. Enter a **Part Product Name** (e.g. Keyboard)
3. Upload an optional **Part Image**
4. Click **Add Part Product**
Repeat this step for each part you want to include in the configuration.
 ### Option B: Add an Existing Part
This allows you to reuse the same part across multiple configurable products, ensuring consistency and saving setup time.
1. Click **Pick Existing**
### Option B: Add an Existing Part
This allows you to reuse the same part across multiple configurable products, ensuring consistency and saving setup time.
1. Click **Pick Existing**
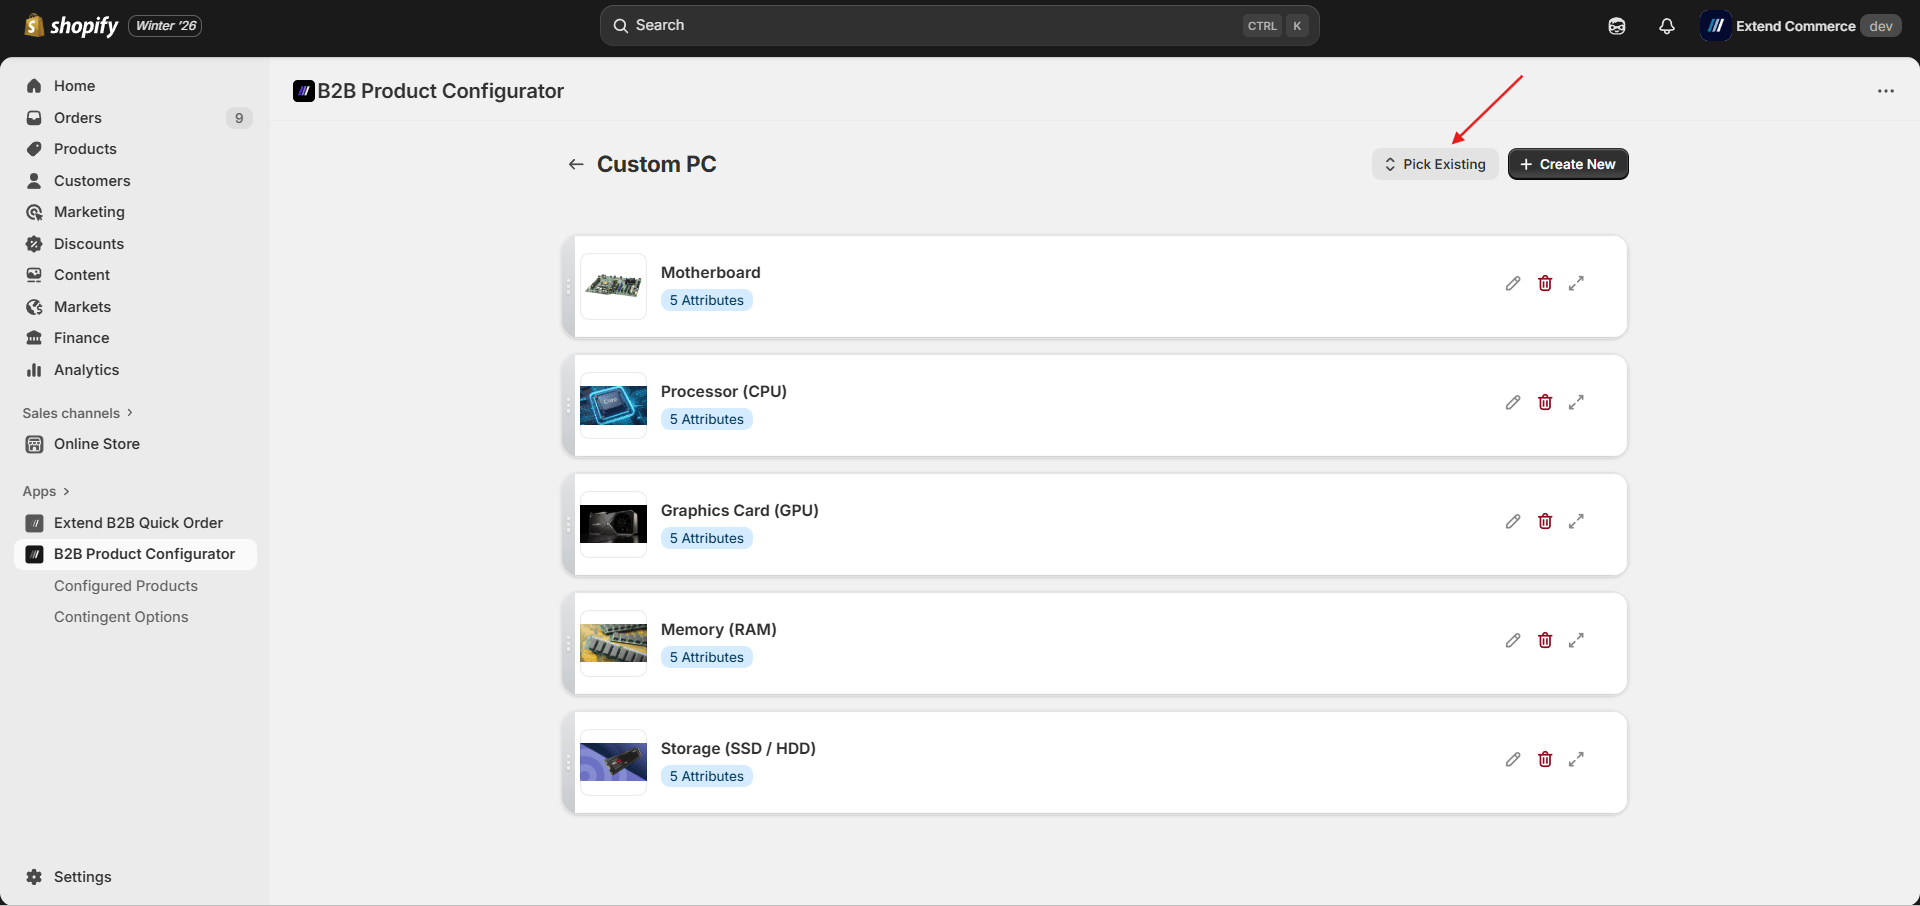 2. In the product picker modal, search and select the existing Product which you want to be a part and click Save.
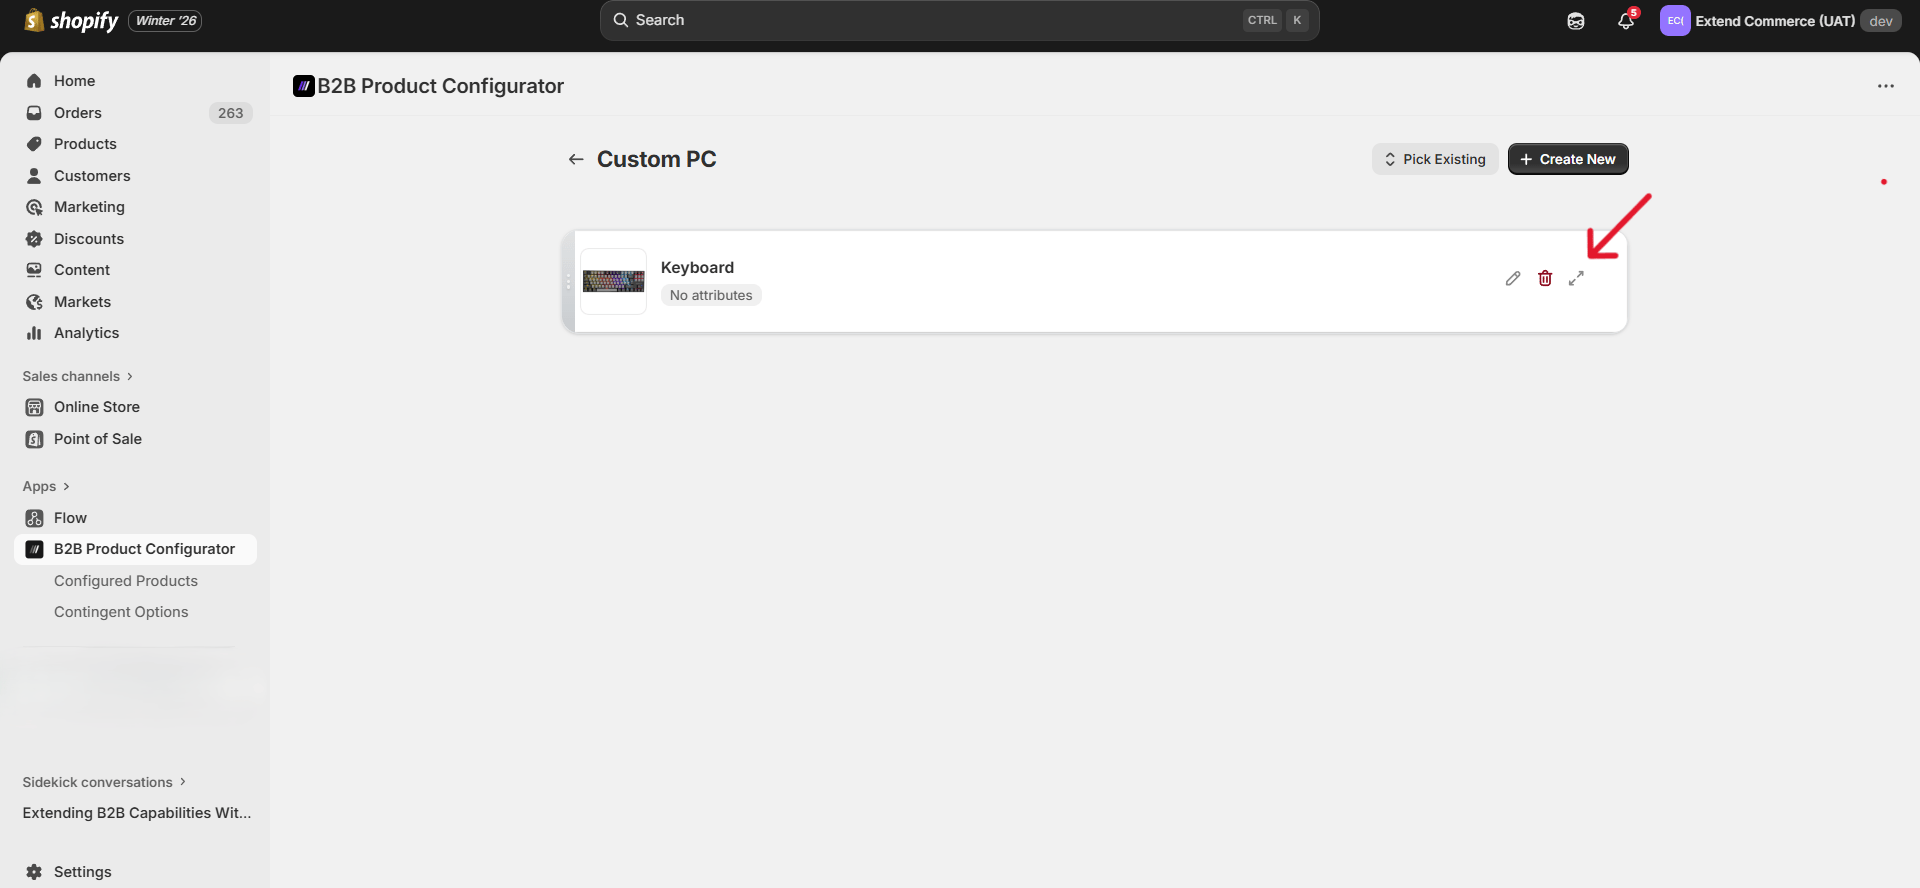
3. If its attributes and SKUs are already setup in the Shopify they will be prefilled when you will click “Expand Details” for that part.
## Step 4: Add Attributes to a Part
Attributes define how a part can vary.
1. Click on “Expand Details” of product part
2. In the product picker modal, search and select the existing Product which you want to be a part and click Save.
3. If its attributes and SKUs are already setup in the Shopify they will be prefilled when you will click “Expand Details” for that part.
## Step 4: Add Attributes to a Part
Attributes define how a part can vary.
1. Click on “Expand Details” of product part
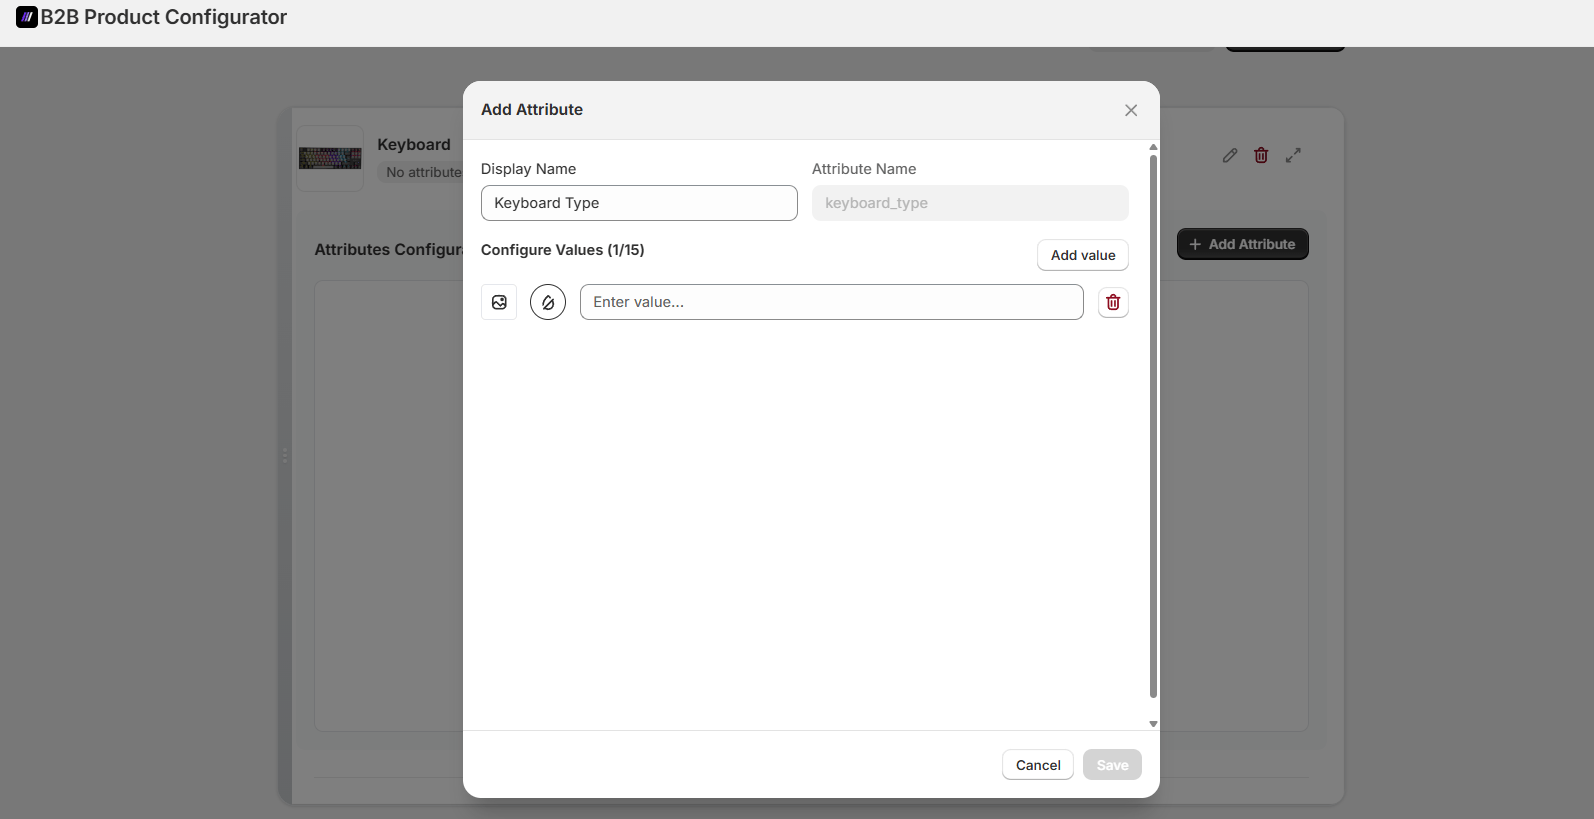
 2. In the **Attributes Configuration** section, click **+ Add Attribute**
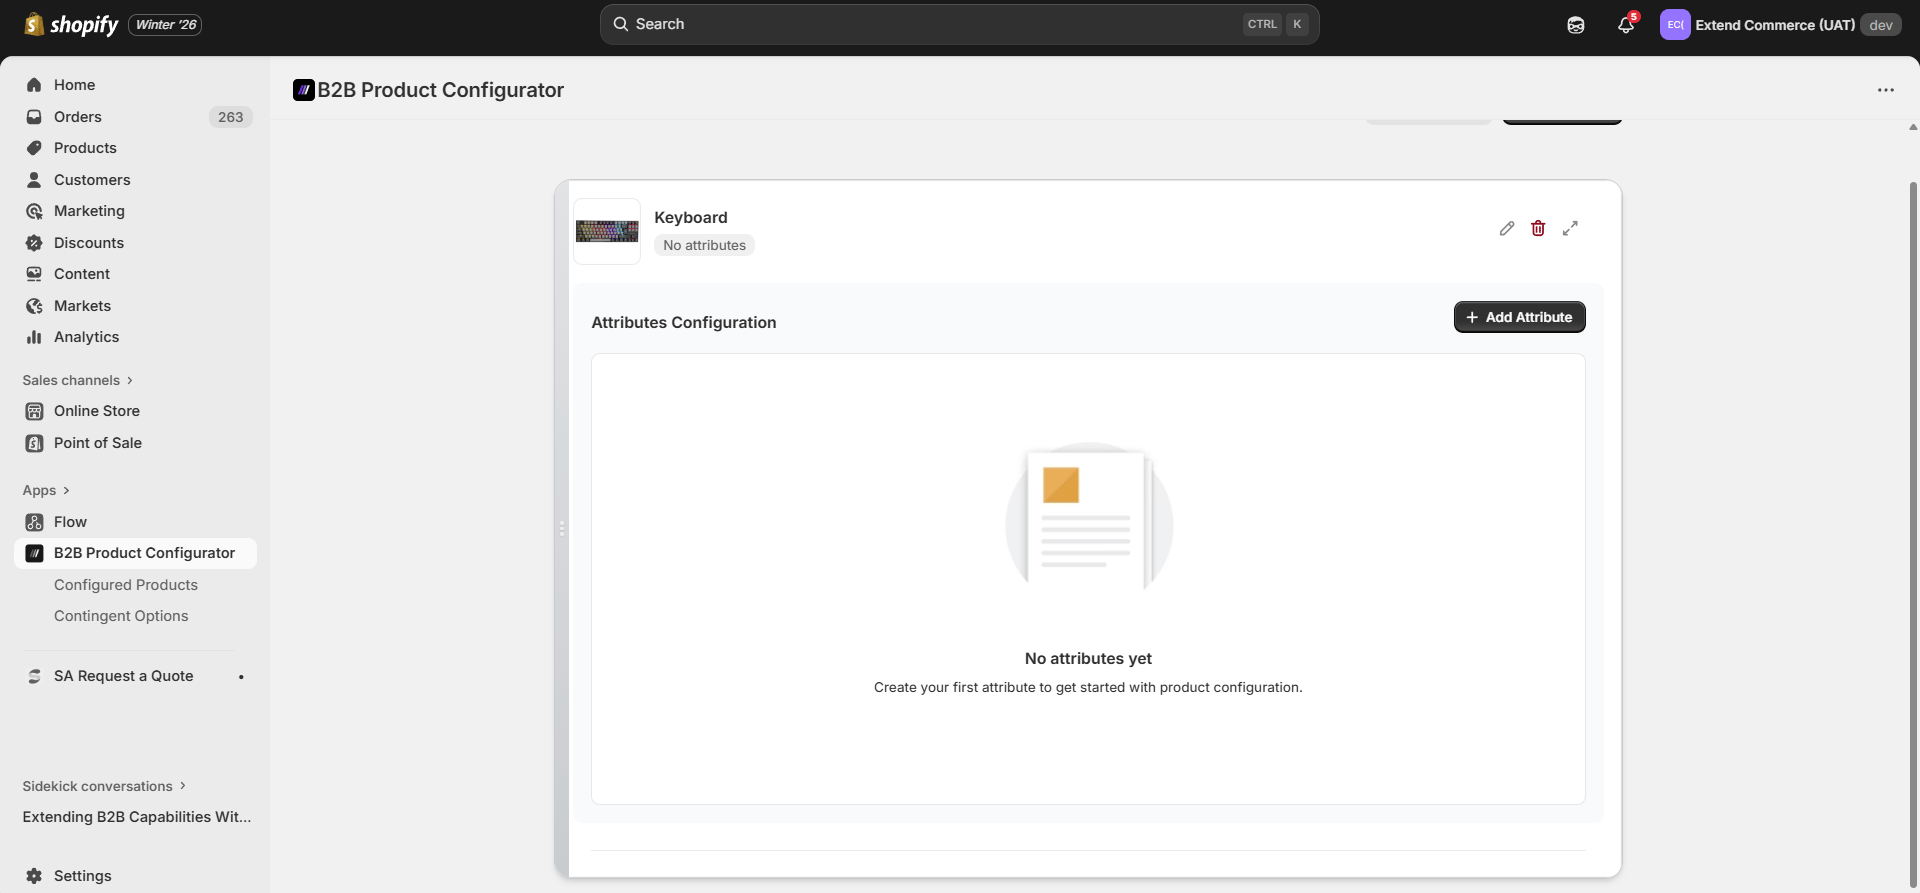 3. Enter:
**Display Name** (e.g. Keyboard Type)
**Attribute Name** (auto-generated)
4. Click **Add Value** to start adding attribute values
3. Enter:
**Display Name** (e.g. Keyboard Type)
**Attribute Name** (auto-generated)
4. Click **Add Value** to start adding attribute values
 ## Step 5: Add Attribute Values
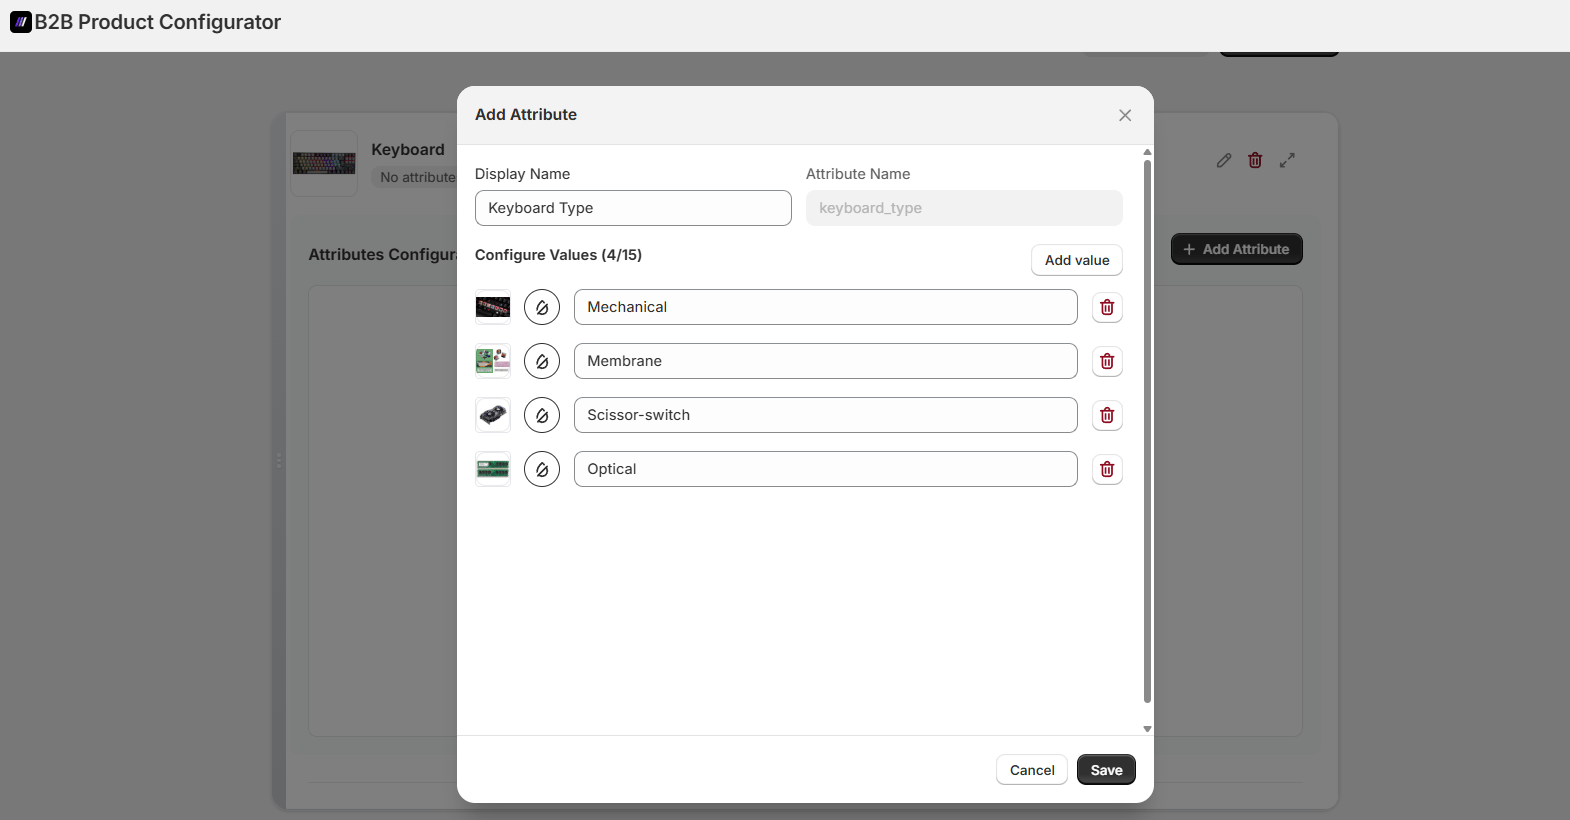
Attribute values are the selectable options shown to customers.
For each value:
1. Enter the value name
2. Upload an optional image or Select a color swatch
3. Click **Save**
You can add up to 15 values per attribute.
## Step 5: Add Attribute Values
Attribute values are the selectable options shown to customers.
For each value:
1. Enter the value name
2. Upload an optional image or Select a color swatch
3. Click **Save**
You can add up to 15 values per attribute.
 ## Step 6: Configure SKUs
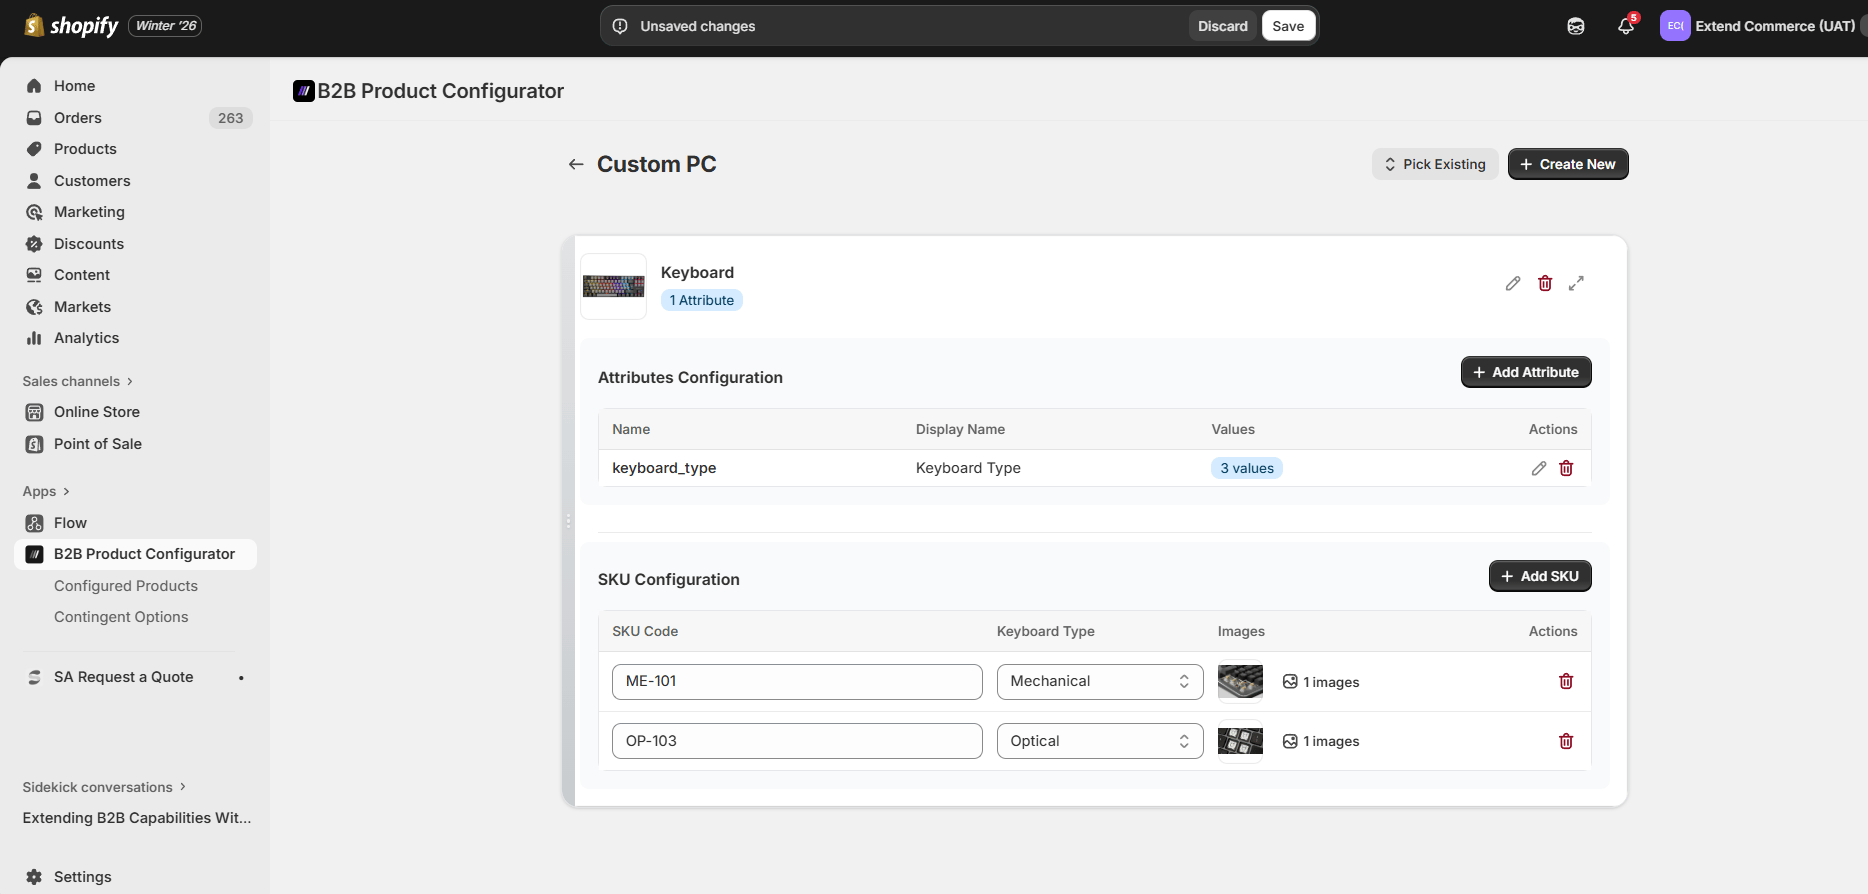
SKU configuration links attribute values to real SKUs for inventory, pricing, and fulfillment.
1. Scroll to the **SKU Configuration** section
2. Click **+ Add SKU**
3. For each SKU:
* Enter a **SKU Code** (e.g. ME-101)
* Select the corresponding **Attribute Value** for which the SKU is.
* Upload an image if required
Repeat this step for all attribute values you want to sell.
## Step 6: Configure SKUs
SKU configuration links attribute values to real SKUs for inventory, pricing, and fulfillment.
1. Scroll to the **SKU Configuration** section
2. Click **+ Add SKU**
3. For each SKU:
* Enter a **SKU Code** (e.g. ME-101)
* Select the corresponding **Attribute Value** for which the SKU is.
* Upload an image if required
Repeat this step for all attribute values you want to sell.
 ### Editing and Deleting
You can update part details, attributes, attribute values, and SKUs at any time by clicking the **Edit** icon next to the respective item.
To remove any of the following:
* Product parts
* Attributes
* Attribute values
* SKUs
Click the **Delete** icon associated with the item.
> **Note:** Deleted items are permanently removed from the configuration and will no longer be available for customer selection.
## Step 7: Save Your Configuration
1. Click **Save** at the top of the page
2. Your product configuration is now active and ready to be used on the storefront
### Editing and Deleting
You can update part details, attributes, attribute values, and SKUs at any time by clicking the **Edit** icon next to the respective item.
To remove any of the following:
* Product parts
* Attributes
* Attribute values
* SKUs
Click the **Delete** icon associated with the item.
> **Note:** Deleted items are permanently removed from the configuration and will no longer be available for customer selection.
## Step 7: Save Your Configuration
1. Click **Save** at the top of the page
2. Your product configuration is now active and ready to be used on the storefront