> ## Documentation Index
> Fetch the complete documentation index at: https://help.extendcommerce.com/llms.txt
> Use this file to discover all available pages before exploring further.
# Metafield Integration in Extend POS
> Learn how to display and capture Order Metafields (Date, Single Line Text, and Choice List) on the checkout screen in Extend POS.
# Steps
## **1. Create Order Metafields in Shopify Admin**
First, create the metafields you want to use on the checkout screen.
1. In the **Shopify Admin**, go to:\
**Settings → Metafields and Metaobjects → Orders**
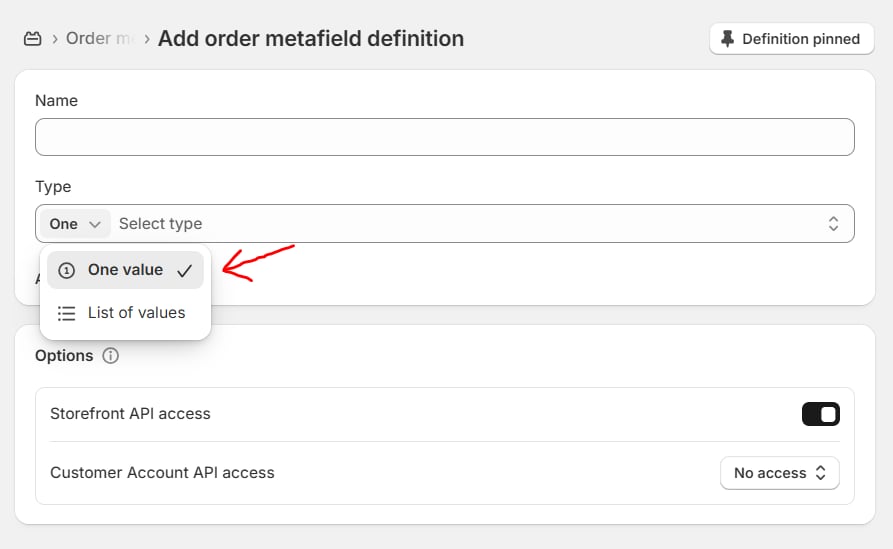
2. Click **Add definition**.
3. Create metafields of the following supported types:
* **Date**
* **Single line text**
* **Choice List (Single line text)**
4. Save your metafield definitions.
> **Note: The Single line text and Choice List (Single line text) currently support type: One Value**
 ## **2. Enable Metafields in Extend POS for B2B & Wholesale**
After creating the metafields in Shopify, enable them inside our app so they appear on the Checkout screen.
1. In Shopify Admin, open **Extend POS for B2B & Wholesale**.
2. Go to **Settings**.
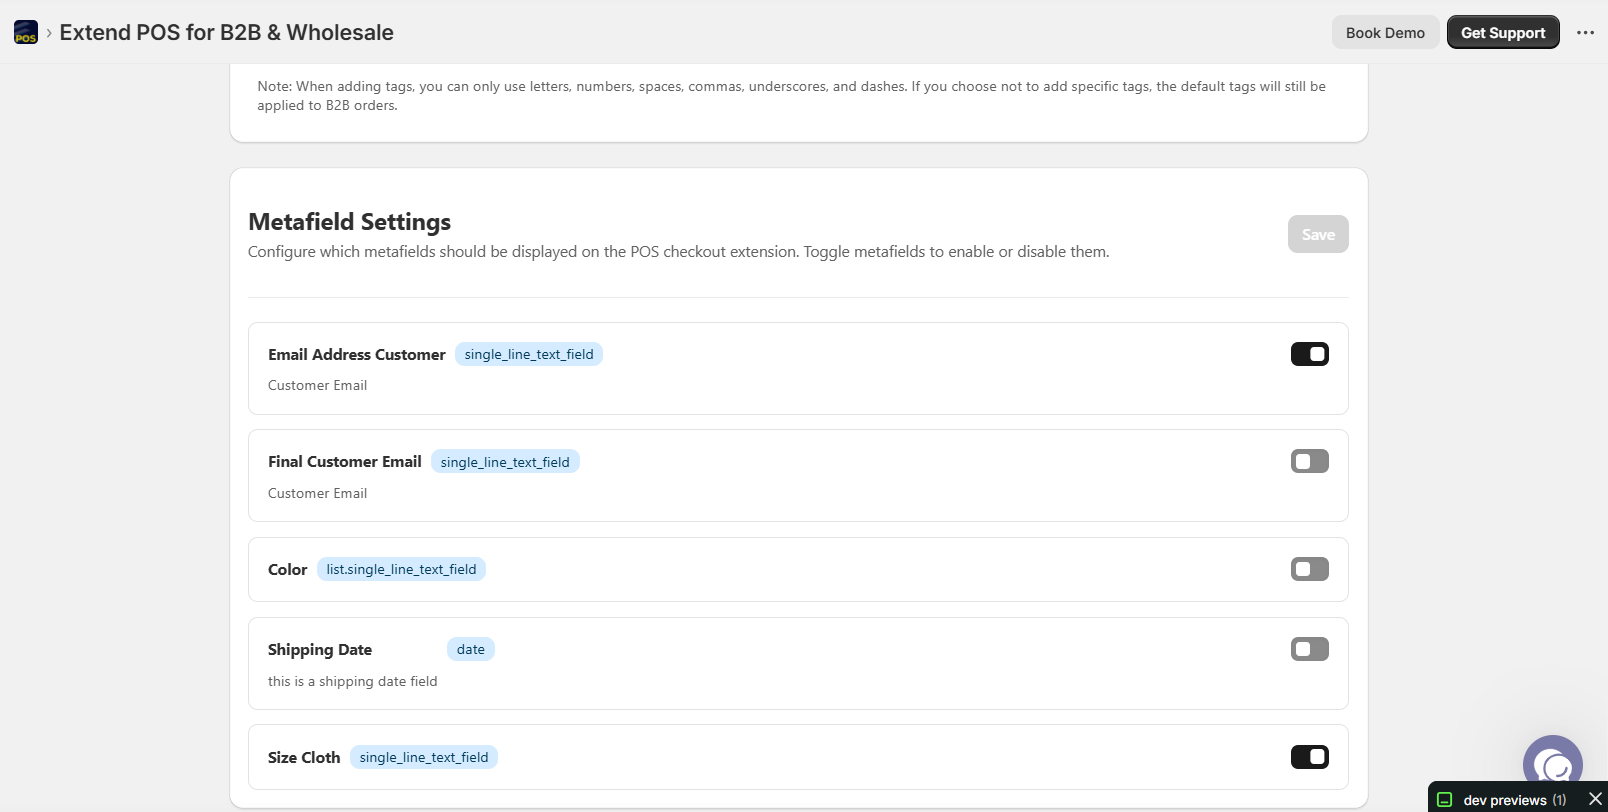
3. Navigate to **Metafield Settings**.
4. Enable the metafields you want to display at checkout.
## **2. Enable Metafields in Extend POS for B2B & Wholesale**
After creating the metafields in Shopify, enable them inside our app so they appear on the Checkout screen.
1. In Shopify Admin, open **Extend POS for B2B & Wholesale**.
2. Go to **Settings**.
3. Navigate to **Metafield Settings**.
4. Enable the metafields you want to display at checkout.
 ## **3. Capture Metafields on the Extend POS Checkout Screen**
1. Open the **Extend POS for B2B & Wholesale** app on Shopify.
2. Create a [B2B Order](/shopify/extend-pos-for-b2b-wholesale/creating-a-b2b-order) using our app’s usual order creation flow.
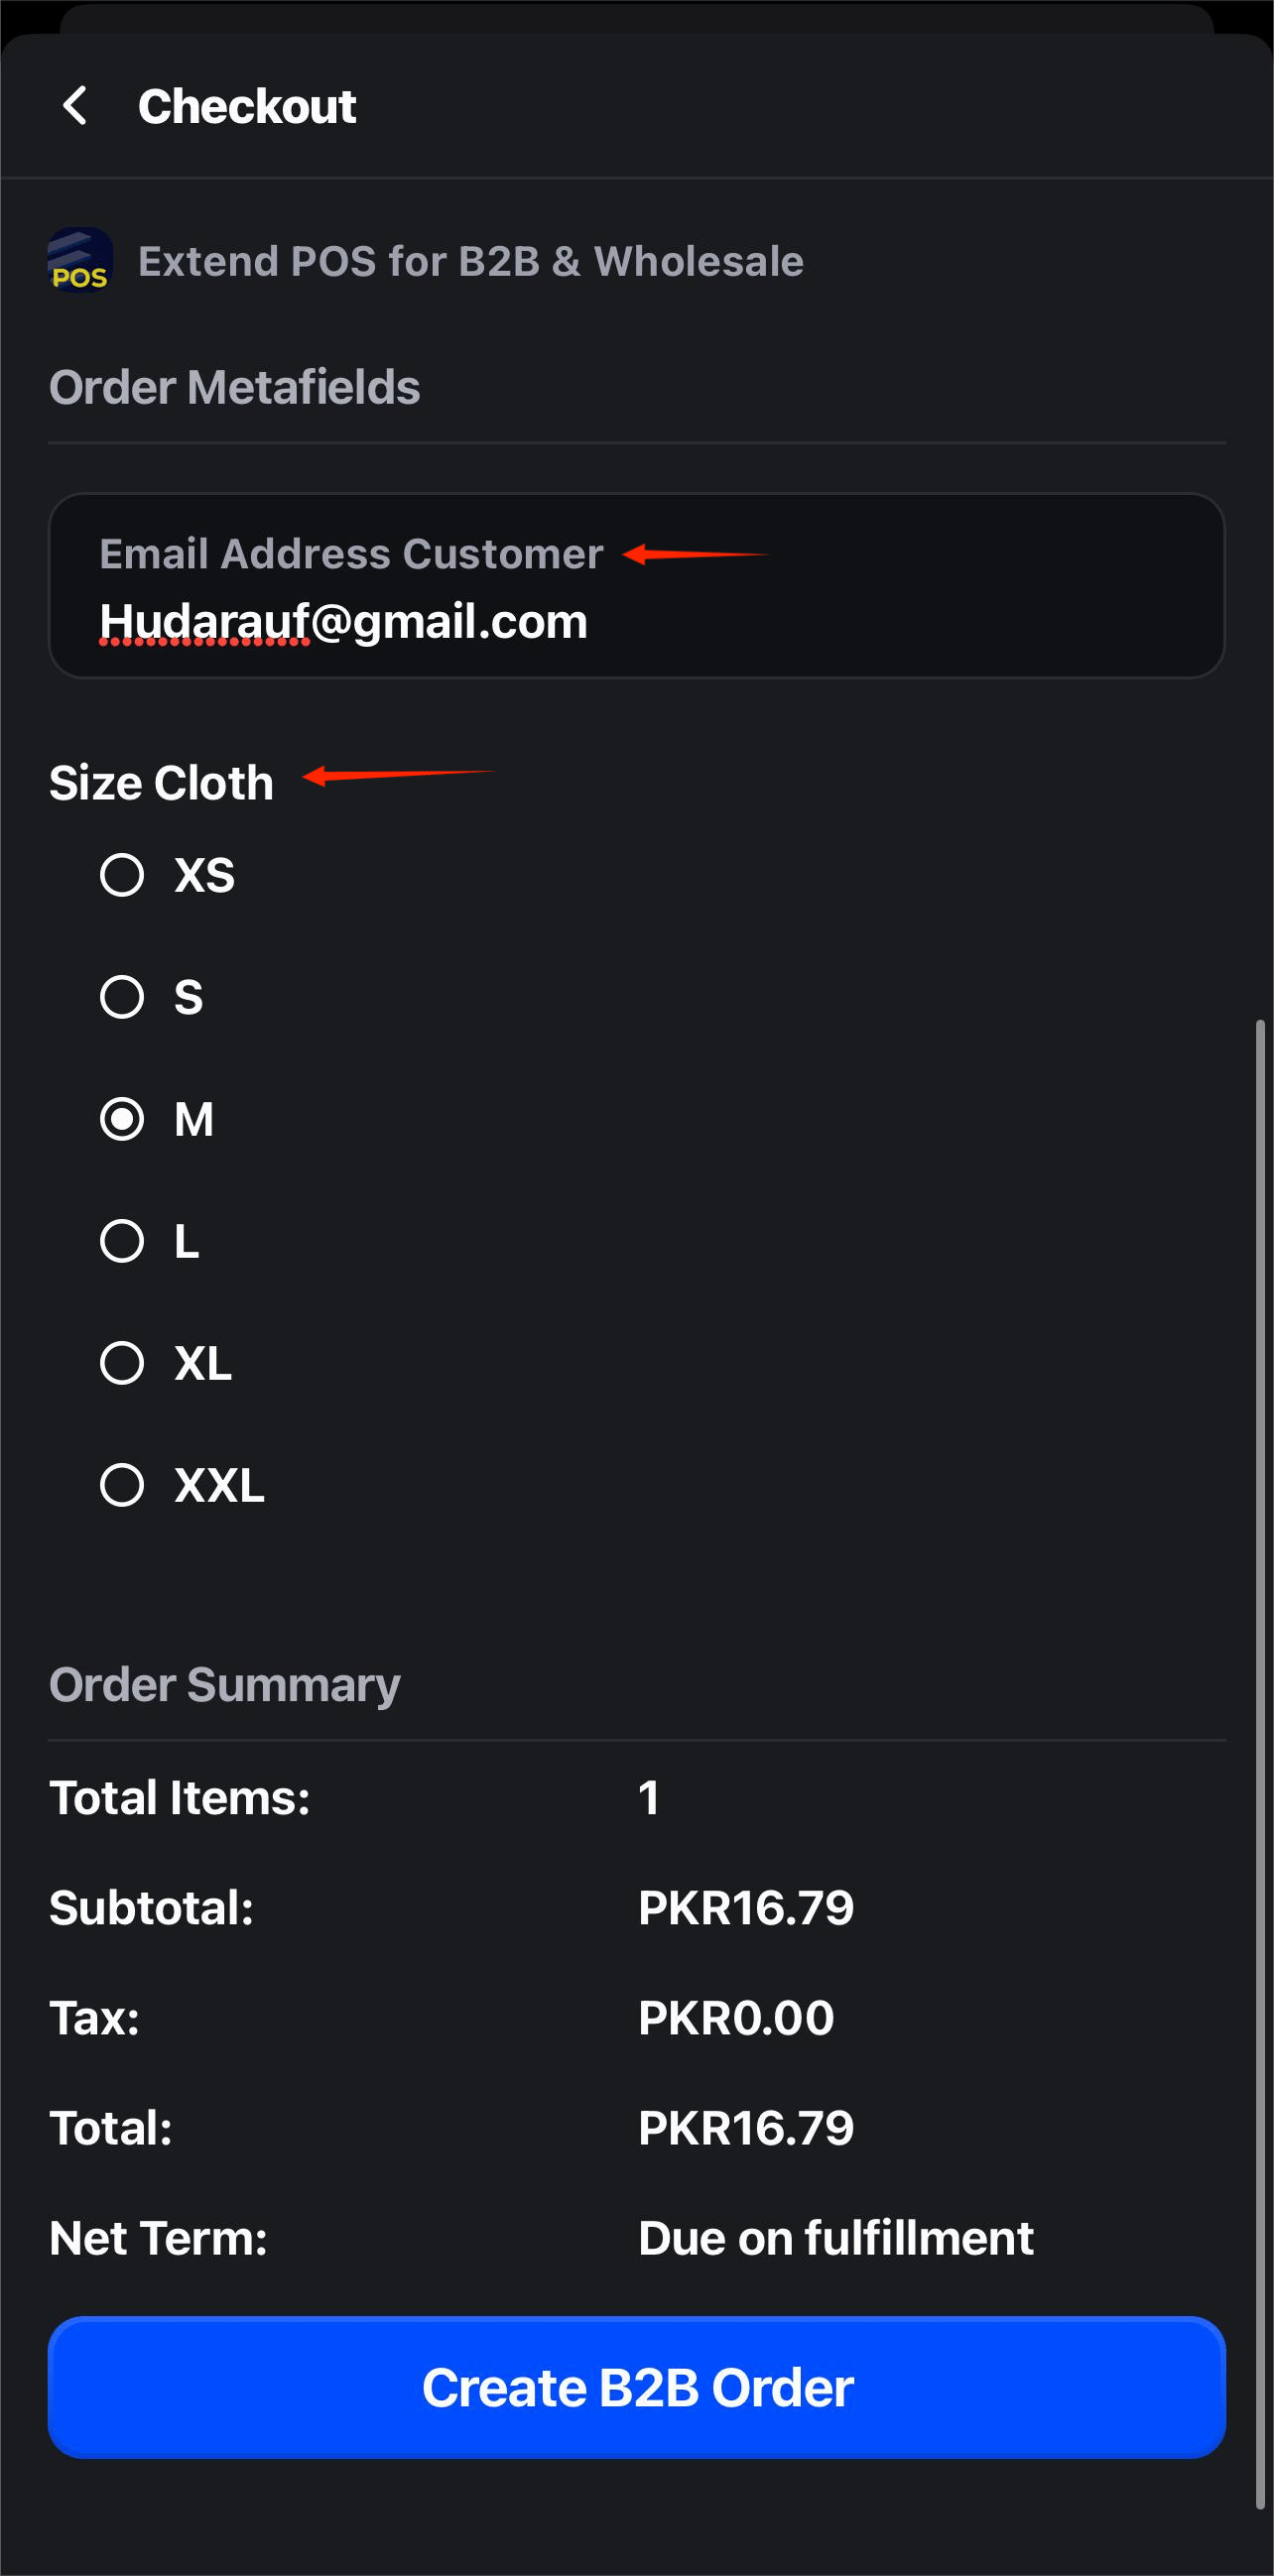
3. When you reach the **Checkout screen**, you will now see the metafields you enabled.
4. Enter the required values for each metafield.
5. Complete the order.
## **3. Capture Metafields on the Extend POS Checkout Screen**
1. Open the **Extend POS for B2B & Wholesale** app on Shopify.
2. Create a [B2B Order](/shopify/extend-pos-for-b2b-wholesale/creating-a-b2b-order) using our app’s usual order creation flow.
3. When you reach the **Checkout screen**, you will now see the metafields you enabled.
4. Enter the required values for each metafield.
5. Complete the order.
 ## **4. Verify Saved Metafield Values**
After the order is created:
1. Go to the order in the **Shopify Admin**.
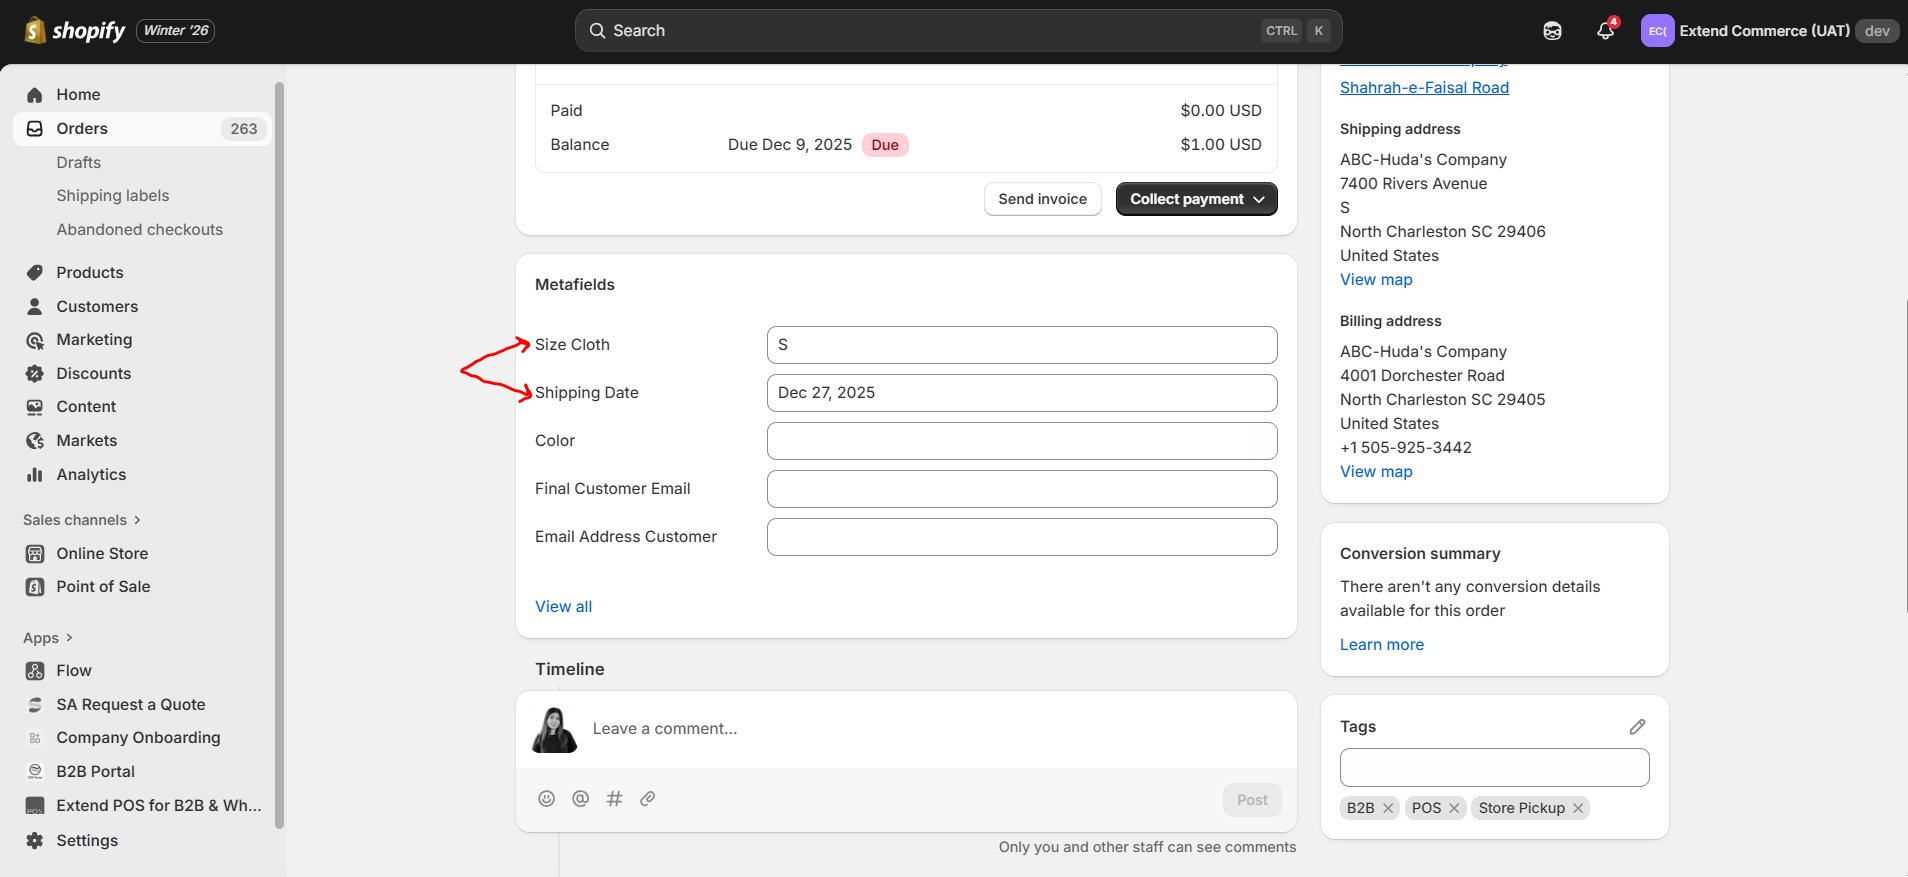
2. Scroll to the **Metafields** section of the order.
3. Confirm that the values you entered at checkout have been correctly saved.
## **4. Verify Saved Metafield Values**
After the order is created:
1. Go to the order in the **Shopify Admin**.
2. Scroll to the **Metafields** section of the order.
3. Confirm that the values you entered at checkout have been correctly saved.
 By following these steps, you can easily configure and capture custom order information directly from the POS checkout screen. This ensures that all required data is stored within the order metafields, improving accuracy and streamlining your B2B order workflow.